Single Sign-On via WWPass
You can integrate WWPass Authentication into Creatio using the Open ID protocol to manage single-sign on for all Creatio Users in the Corporate Domain.
The following steps are the general procedure required to set up Single Sign-On using WWPass Authentication in Creatio:
- Install the WWPass Key App Read more >>>
- Perform the setup in WWPass Customer Portal Read more >>>
- Perform the setup in Creatio Read more >>>
Install the WWPass Key App
If you already have the WWPass Key App installed and setup then you may skip this section and perform the setup in WWPass Customer Portal.
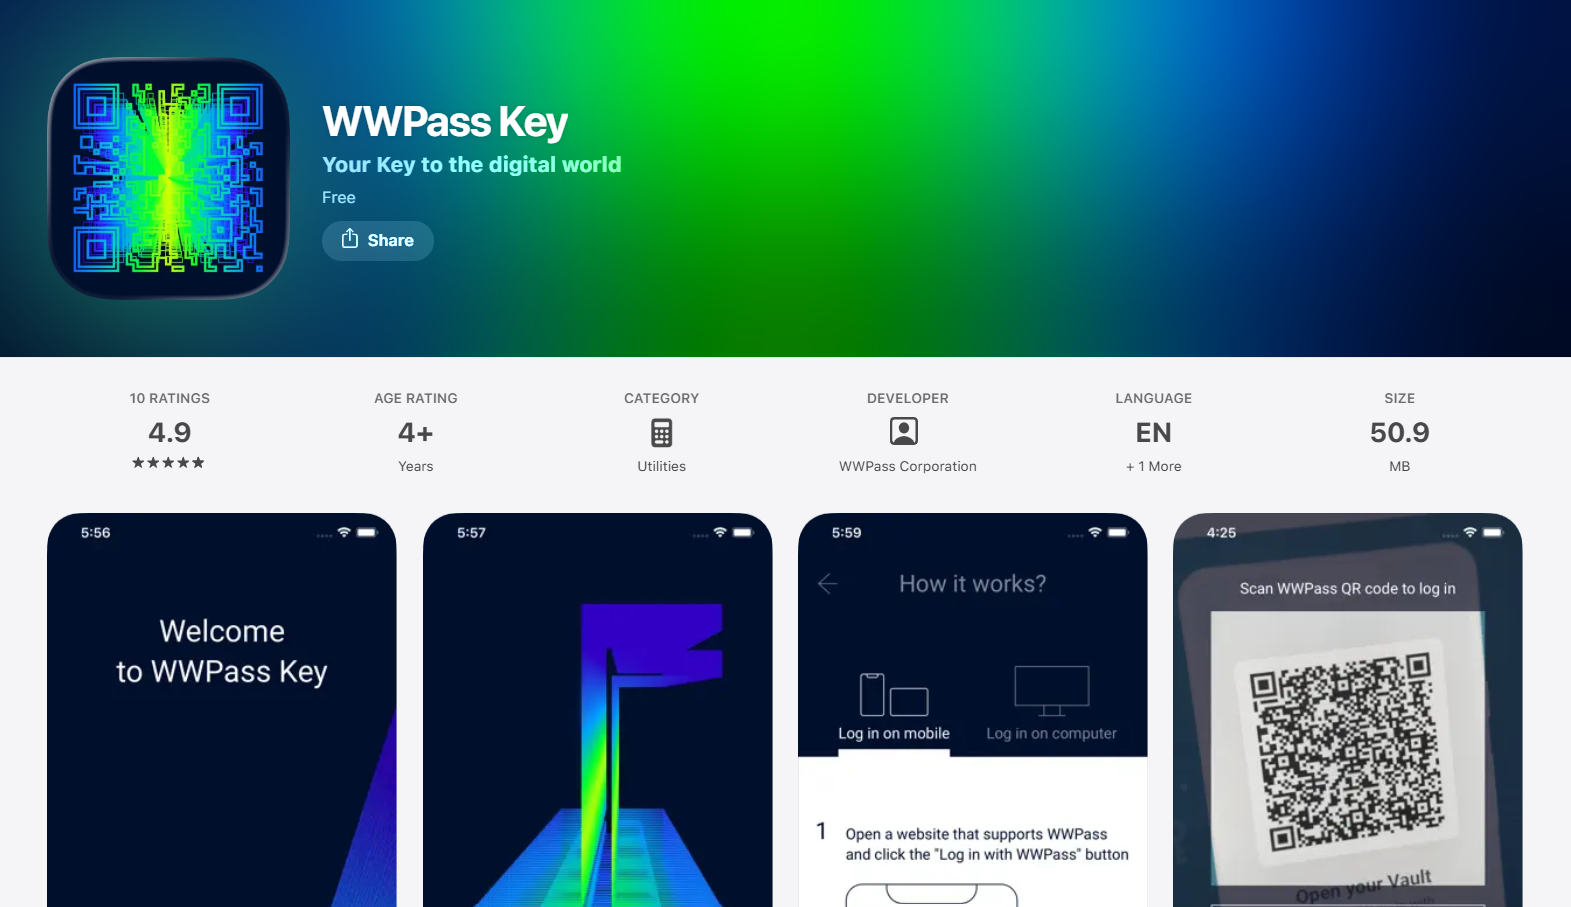
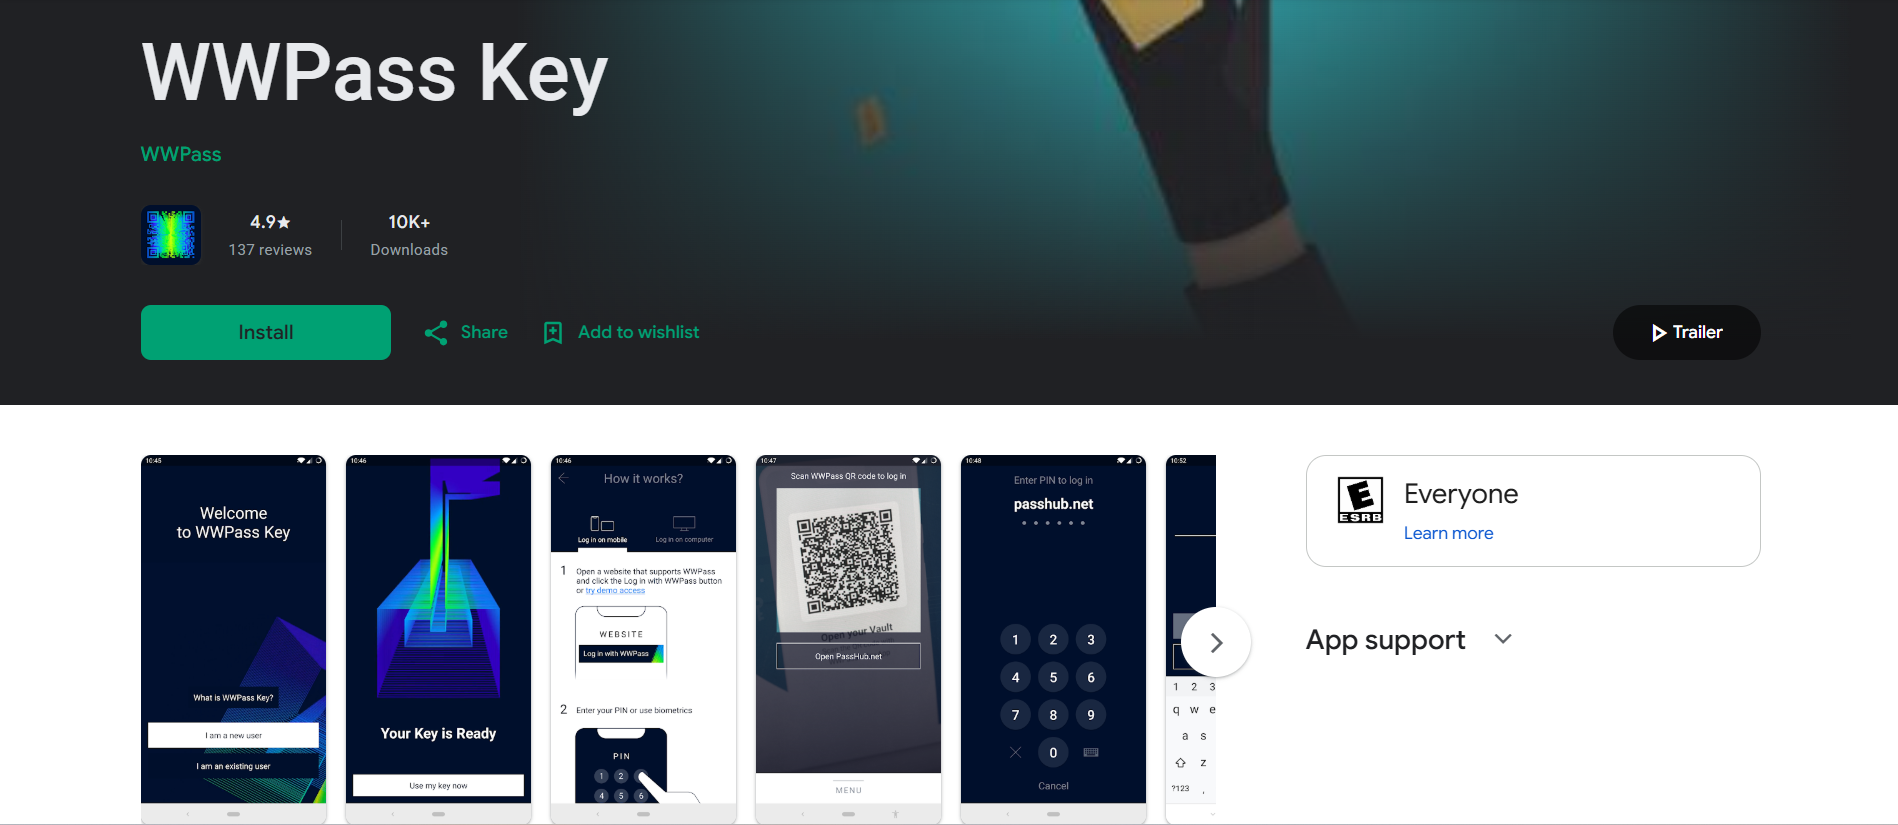
- Open the Play Store or App Store and download the app.
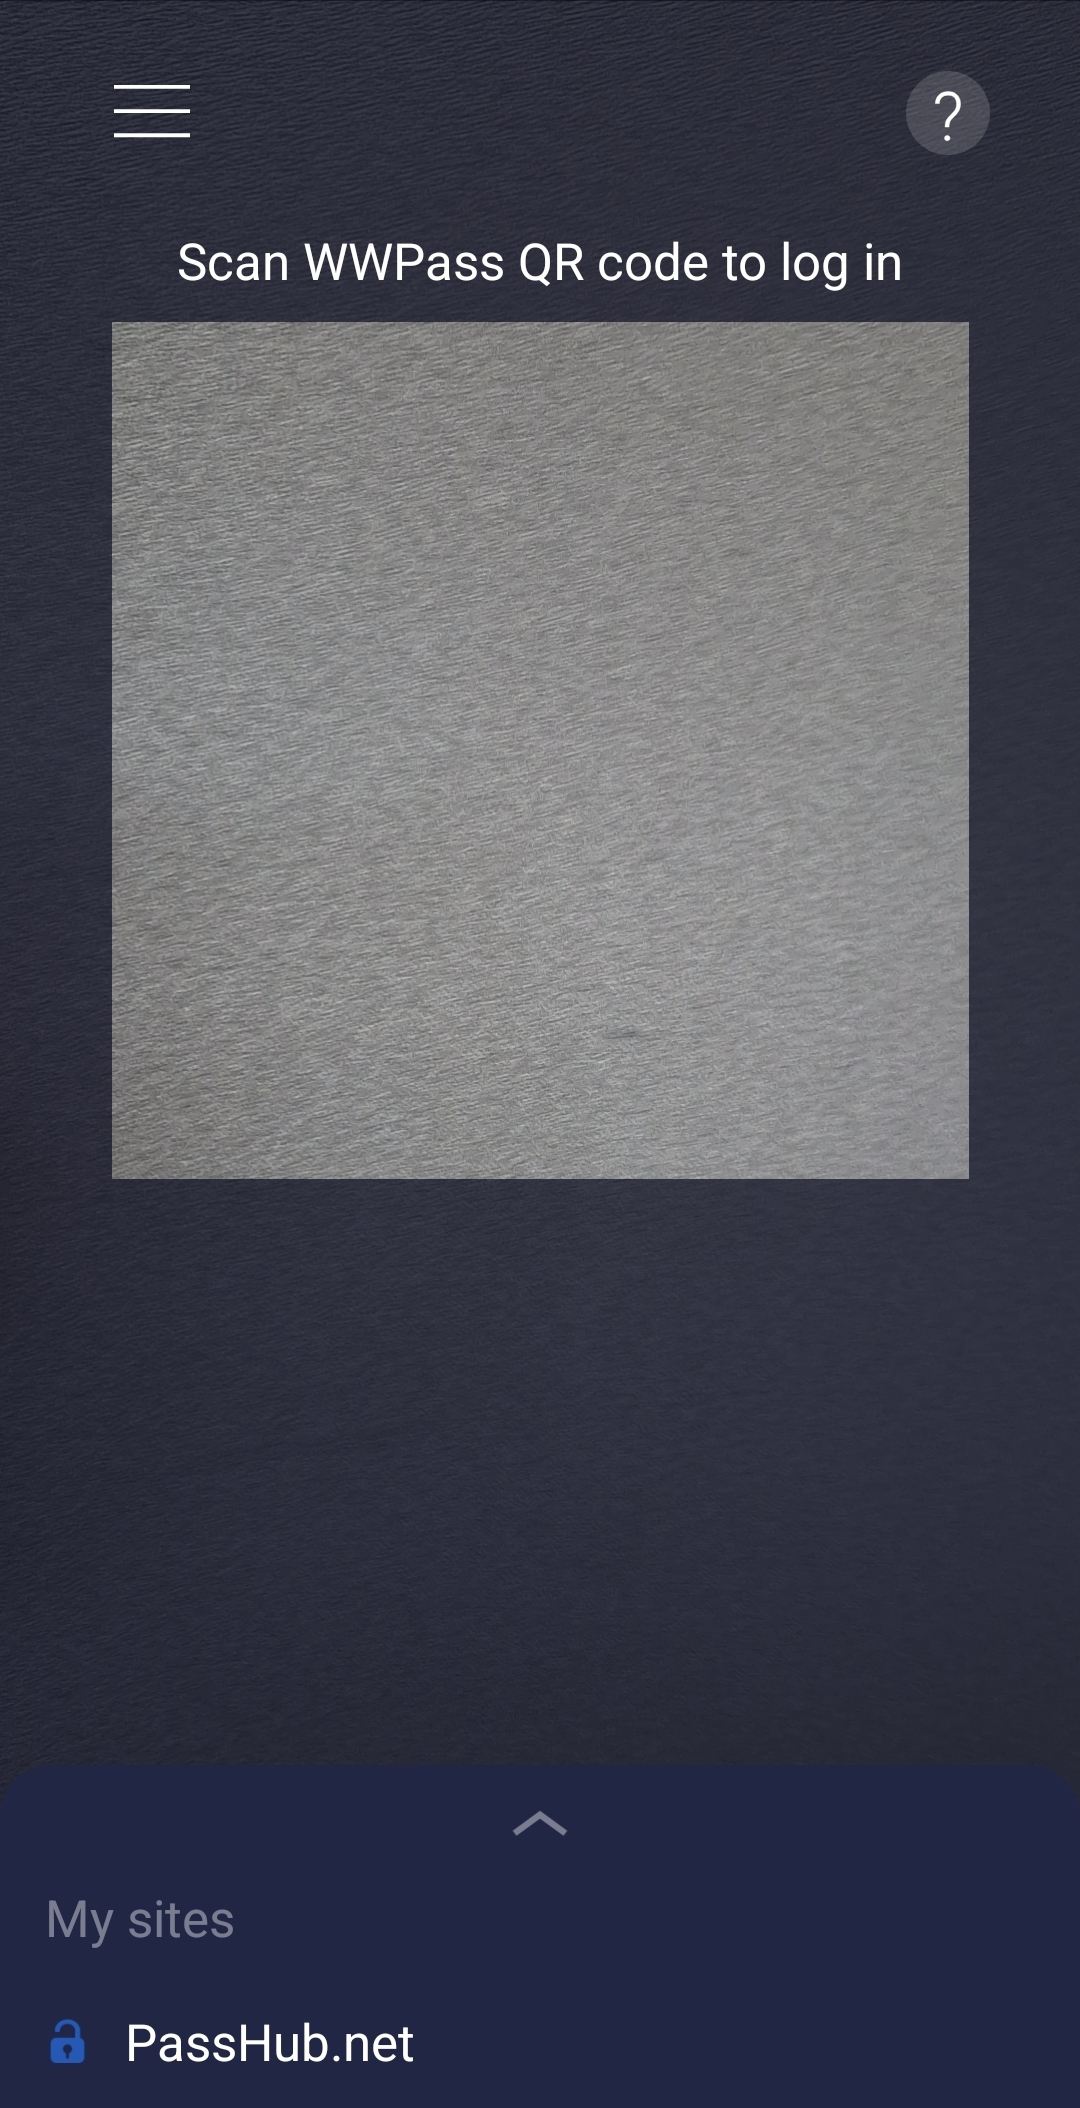
- Open the Application on the phone and it should look like this:
- Backup your WWPass Key (Optional): Backup is necessary to recover your WWPass Key in case your phone is lost, stolen or you receive a new device. WWPass Key Backup Video
Perform the setup in WWPass Customer Portal
- Go to manage.wwpass.com or access it by going to wwpass.com and clicking "Log in".

- Login using the WWPass Key App on the phone and click “Continue” then accept the agreement.
- Enter your E-mail address and type in the verification code to confirm your E-mail.
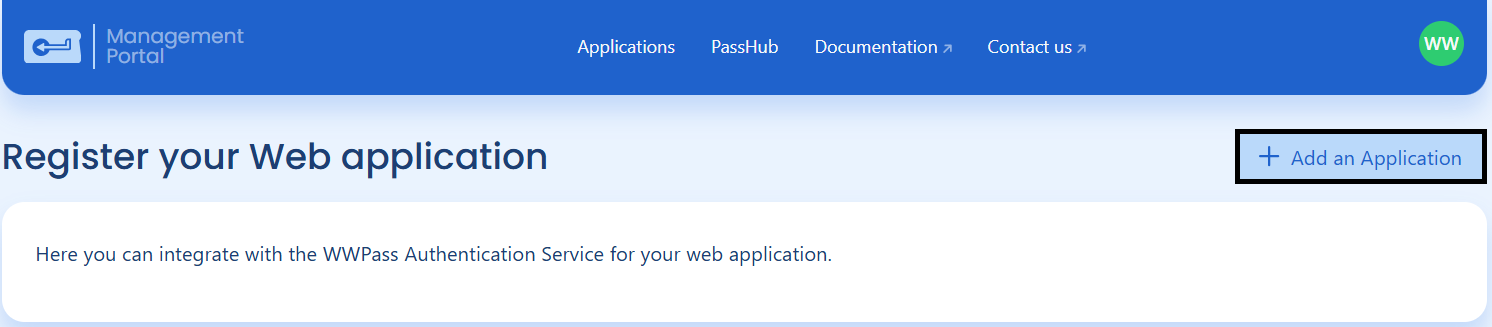
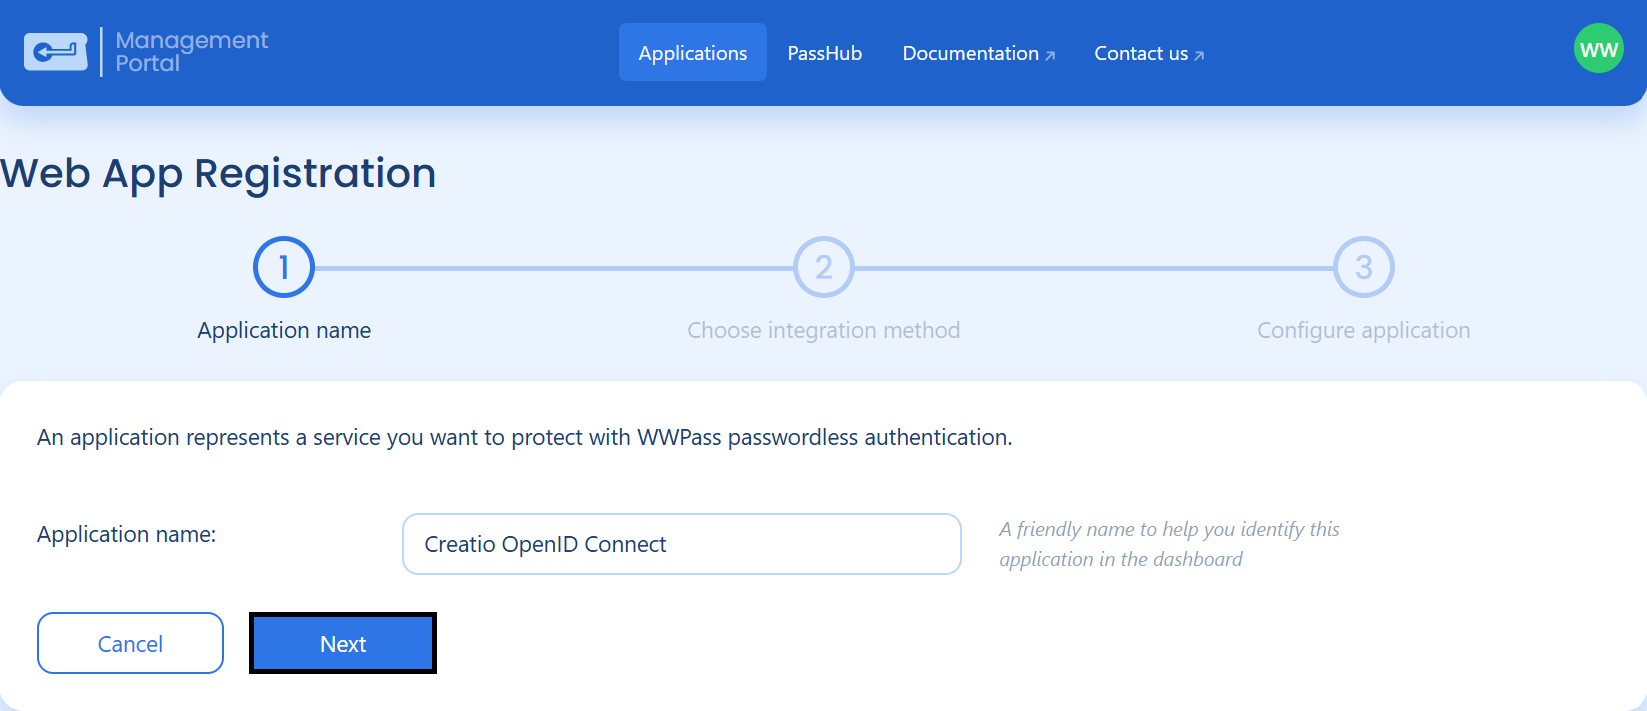
- Click on “Add an Application” and give it a name such as “Creatio OpenID Connect”.
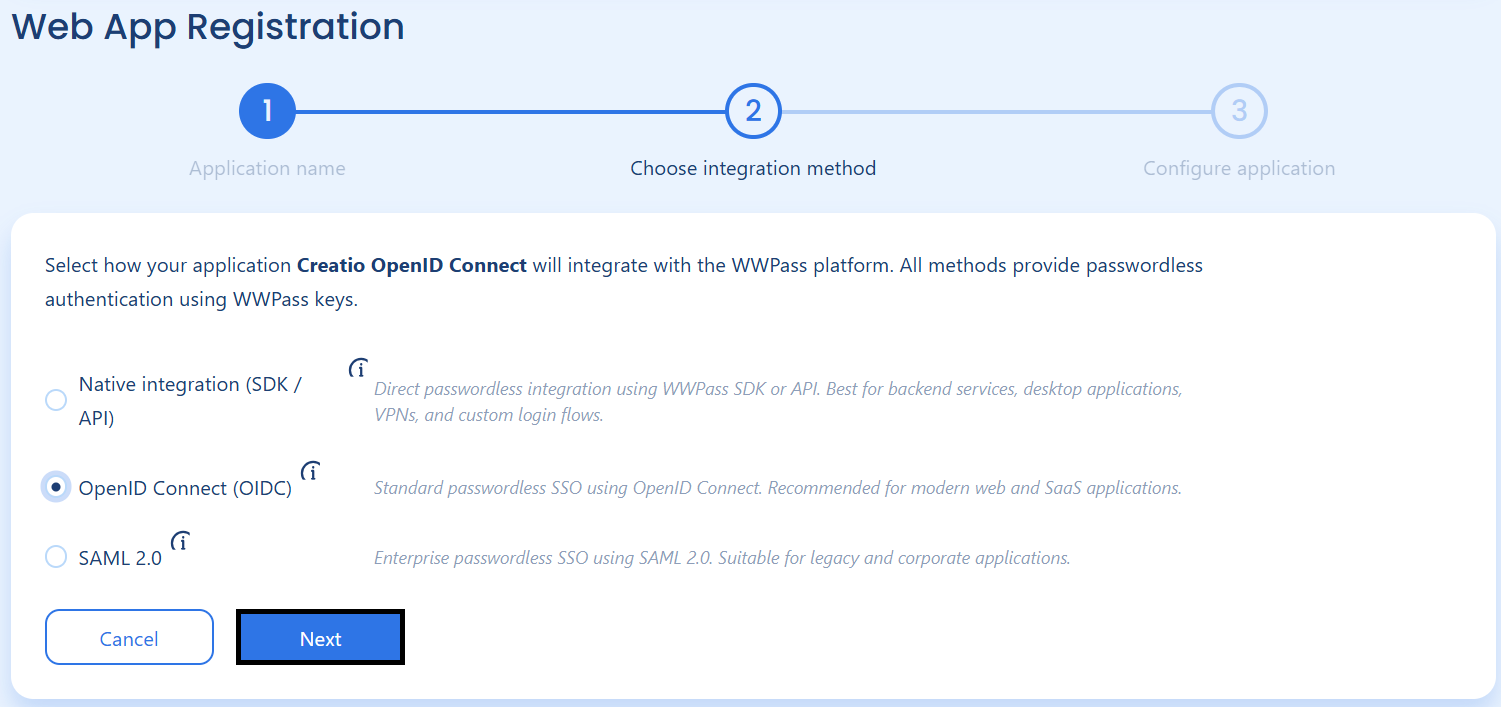
- From here select OpenID Connect (OIDC)
- Enter payment information for a WWPass Authentication subscription.
- We suggest using your own custom domain however for immediate setup you may press “Skip” at the bottom.
If you would like to continue with a custom domain you may follow the documentation here.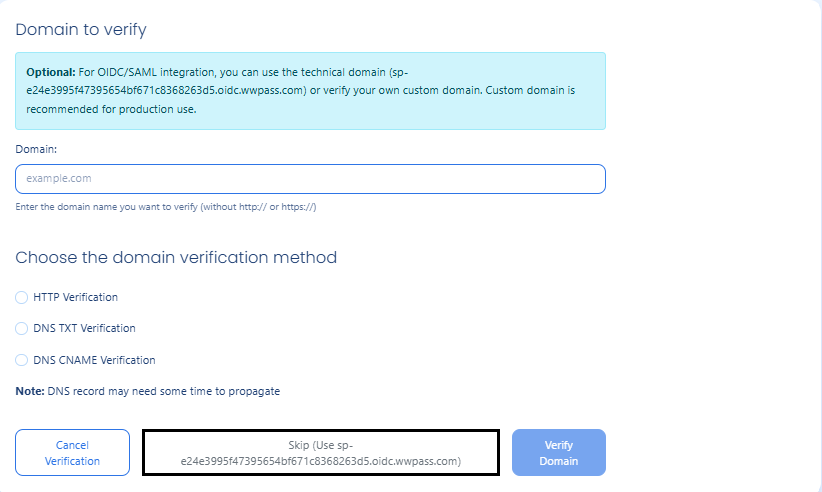
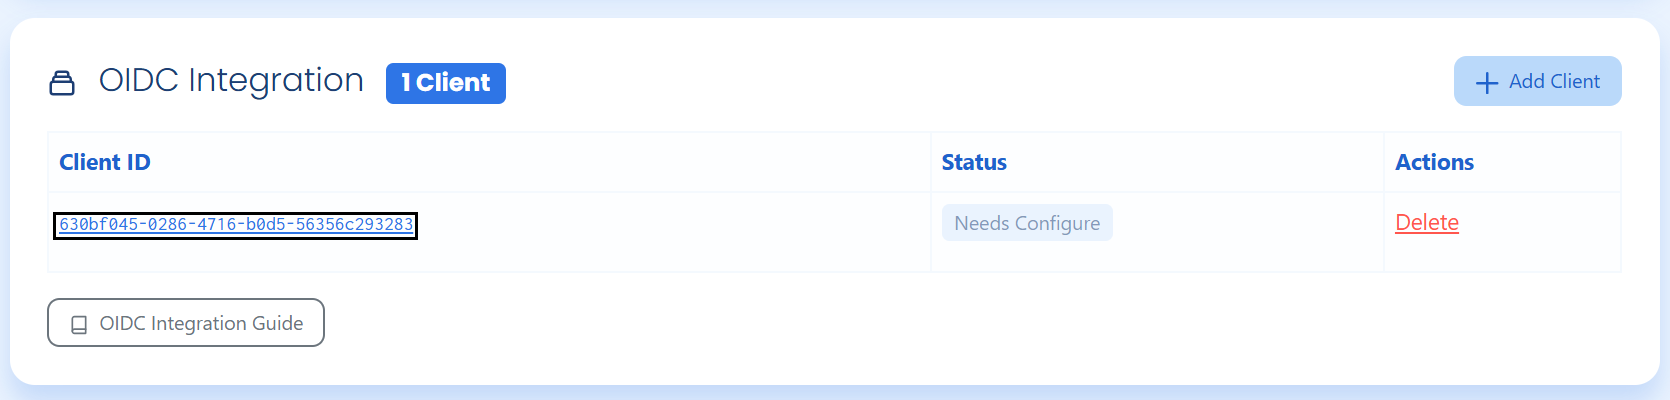
- Scroll down and click on the Client ID number to open the configuration page.
- Enter Redirect URI for IdP Client:
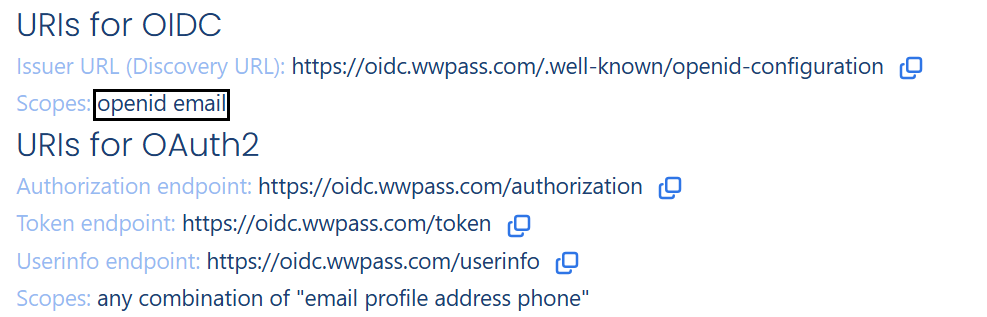
https://[YOURDOMAIN].creatio.com/ServiceModel/AuthService.svc/OpenIdCallback - Verify that the
OpenIDandEmailScopes are set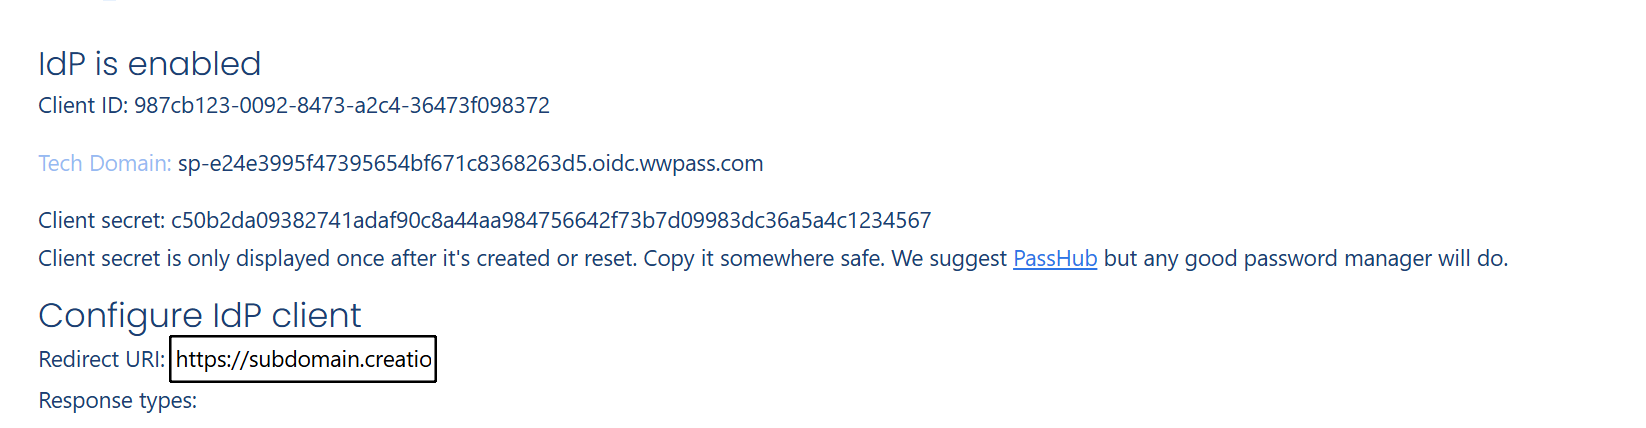
- Save these following values to your machine as they will be used in the Creatio SSO Configuration.
| Parameter | Parameter Value |
|---|---|
| Client ID | Unique ID of the client at the top of the Configuration Page. Example: 987cb123-0092-8473-a2c4-36473f098372 |
| Client Secret | Unique Secret of the client. Found below the Client ID and must be reset to view. It will temporarily reveal itself. Example: c50b2da09382741adaf90c8a44aa984756642f73b7d09983dc36a5a4c1234567 |
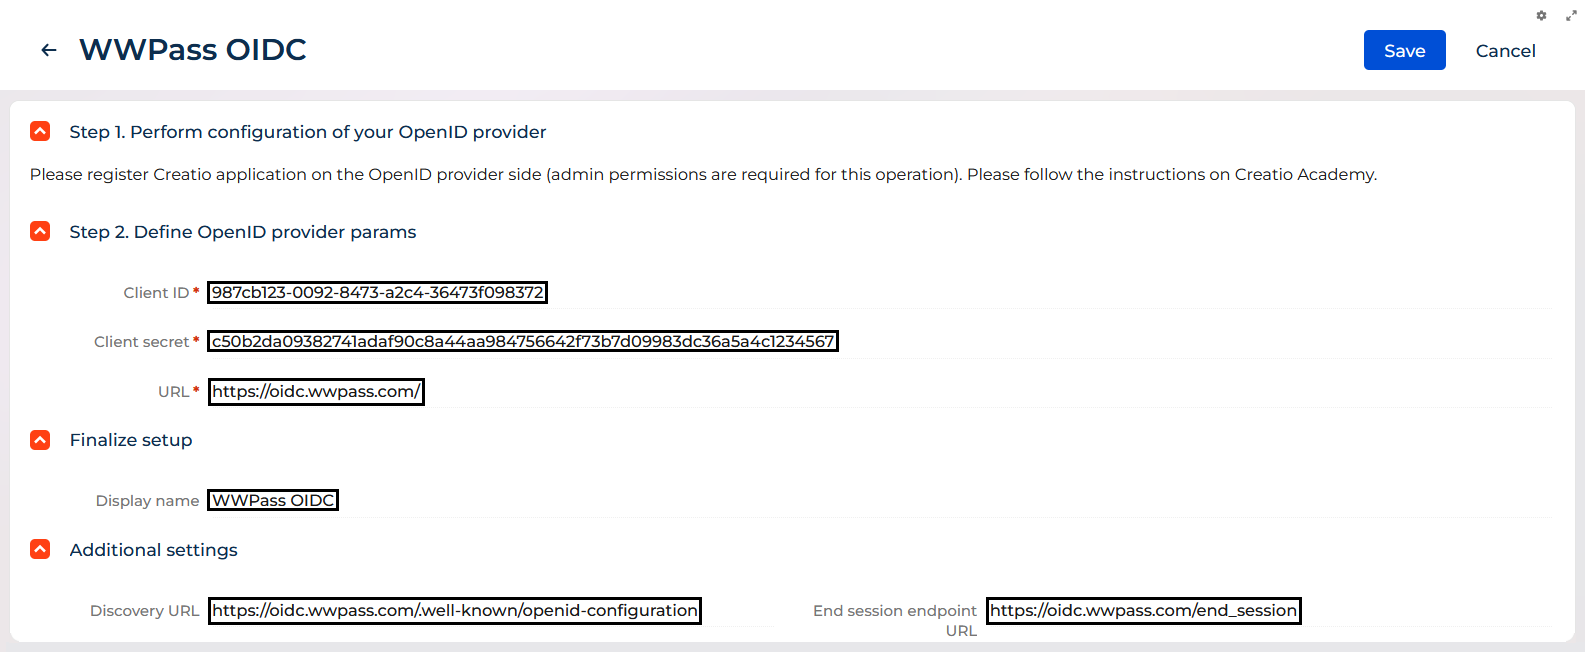
Perform the setup in Creatio
- Once logged in click the
 to open the System Designer.
 - Click on Single Sign On Configuration.
- Click on the
 next to
 External Identity Providersand selectCustom OpenID. - Fill out the following parameters:
| Parameter | Parameter Value |
|---|---|
| Client ID | Found in Section 2's Table |
| Client Secret | Also found in Section 2's Table however only temporarily visible on reset |
| URL | https://oidc.wwpass.com this URL points to the WWPass OIDC Authentication |
| Display Name | An optional parameter which will be displayed inside the Single Sign On configuration page and on the Login page of the Creatio environment |
| Discovery URL | https://oidc.wwpass.com/.well-known/openid-configuration An optional but beneficial parameter that will directly point to the WWPass Open ID Configuration |
| End Session endpoint URL | https://oidc.wwpass.com/end_session An optional and helpful parameter that will allow the user to log out of the account from inside of Creatio |
- Finally click on the
 icon on the top right to save the configuration
 - Turn on Just-In-Time Provisioning (optional). This feature automatically generates the related Creatio user account using information from the identity provider, including user group, employee details, contact information, and more. For company employees, enable the Create and update company employees data when log in (Just-In-Time Provisioning) checkbox and configure the field mappings.
For external users, enable the Create and update external users data when log in (Just-In-Time Provisioning) checkbox and configure the field mappings. You can clear the checkbox to stop Creatio from synchronizing user information from the identity provider during login.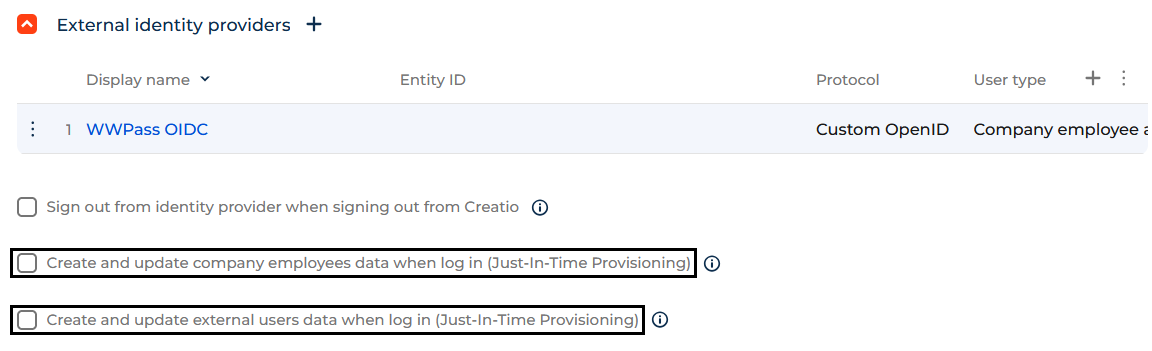
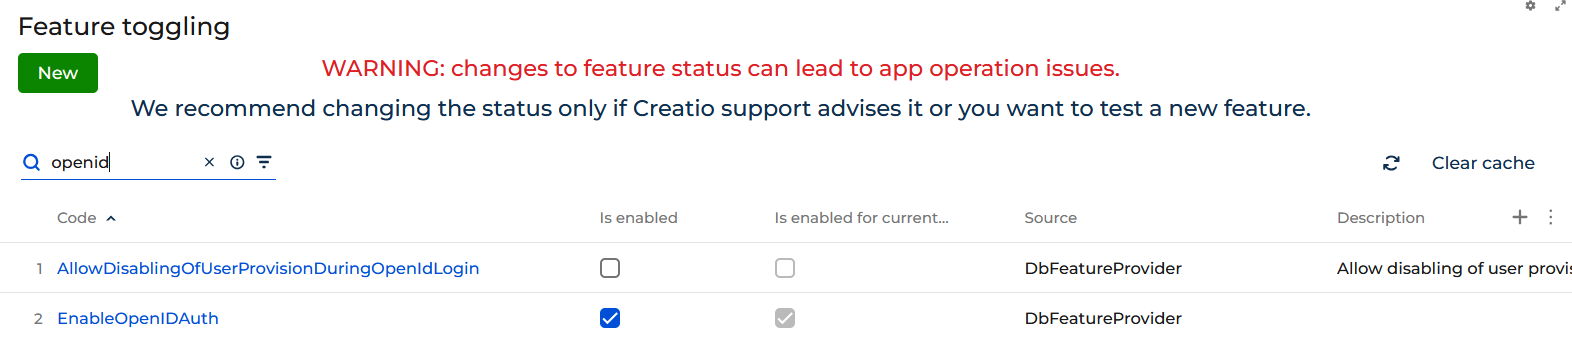
- Go to the Flags Settings page found here at this link:
https://[YOURDOMAIN].creatio.com/0/Shell/#Section/AppFeature_ListPageand enable Open ID Connect.