IBM Security Access Manager for Web 8.0 (wwISAM)
WWPass External Authentication Solution
Setup guide
Enhance your IBM Security Access Manager for Web with the WWPass hardware authentication
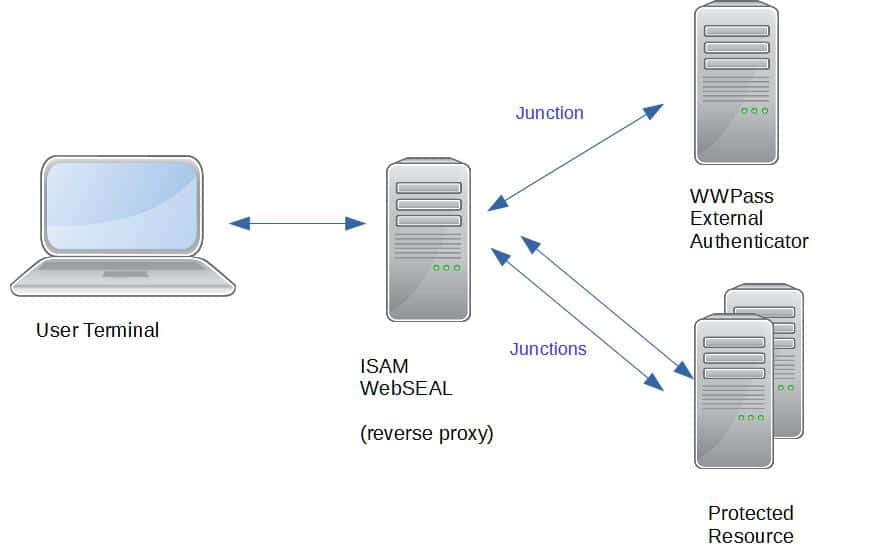
IBM Security Access Manager (ISAM) for Web is essentially a "reverse Web-proxy" which guards access to a number of company Web services.
In its basic form, users authenticate into ISAM protected resources with login / password pairs. This kind of authentication is vulnerable to multiple well-known attacks. At the same time user names and passwords are always a compromise between simplicity and security. ISAM comes with rigorous password policy, thus insisting on secure and hard to remember passwords.
WWPass External Authentication Solution (EAS) provides strong hardware authentication and at the same time removes username/password pairs completely. WWPass EAS is a Web service which utilizes ISAM External Authentication Interface (EAI) and is to be installed and configured as an ISAM External Authenticator junction.
When user authenticates at ISAM server, the request is transparently rerouted to WWPass Web application. On success, ISAM gets user DN (distinguished name) and forwards user to destination Web resource.
ISAM / WWPass external authentication architecture
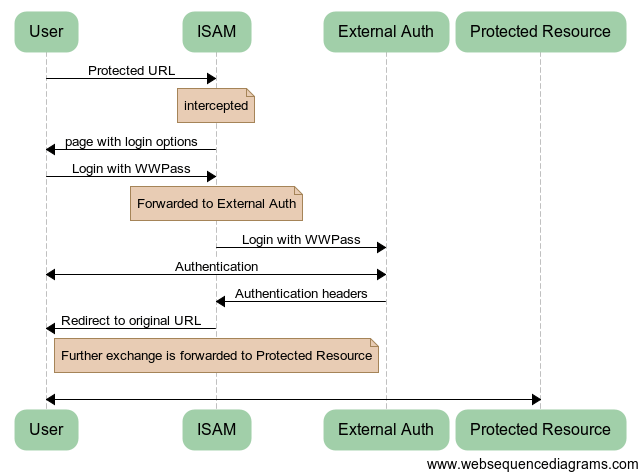
ISAM / WWPass external authentication message flow
- User tries to access protected resource
- ISAM WebSeal intercepts and redirects user request to WWPass authentication server. User is presented WWPass web page.
- User clicks on "Login with WWPass" button and starts WWPass authentication procedure
- On success the WWPass server reports authenticated user distinguished name (DN) to ISAM WebSEAL
- WebSEAL detects authentication success report and allows user to access protected resource
Prerequisites
- IBM Security Access Manager 8.0 for Web
- Experience with ISAM configuration reverse proxy already configured for a protected Web application
- Web application protected by ISAM
- WWPass External Authentication Solution source code
- WWPass Service Provider' certificate and private key
- WWPass Keys, provisioned to users
Configuring IBM Security Access Manager 8.0 for Web
It is assumed that there is a reverse proxy already configured for a protected Web application.
To add WWPass authentication to the reverse proxy, do the following:
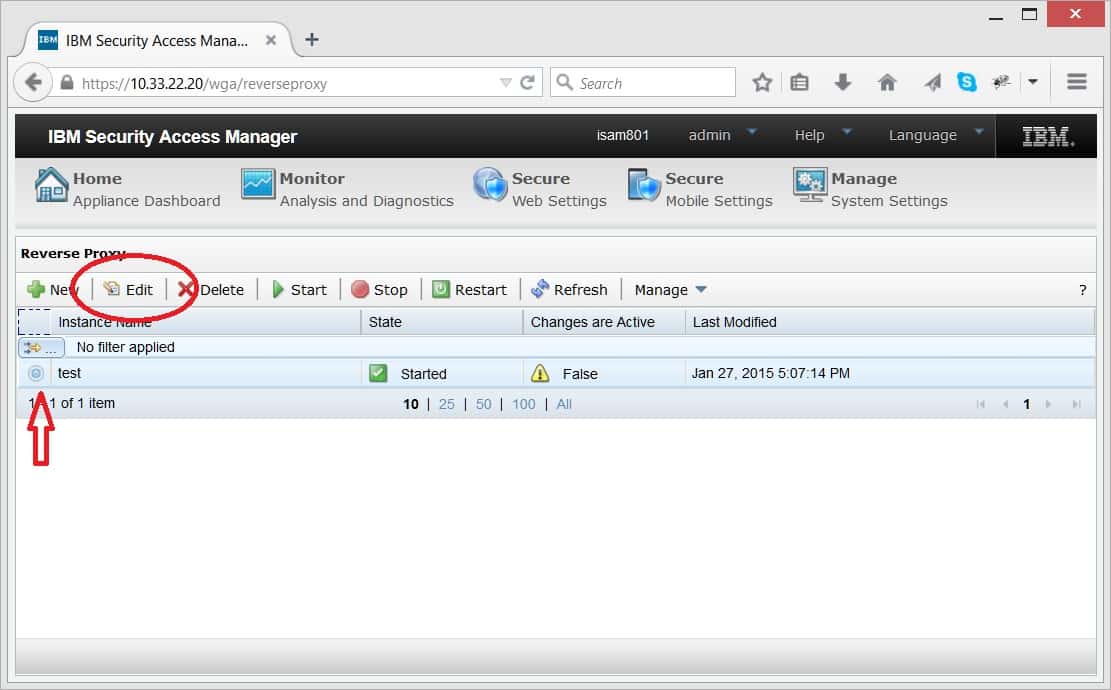
- Go to particular Reverse Proxy management page
- Create new junction for WWPass External Authenticator
- Modify authentication rules for selected ISAM Reverse proxy
- Modify Web pages of the reverse proxy
- Set ACL for External Authenticator
- Set Protected Object Policy (POPs)
SELECT A REVERSE PROXY
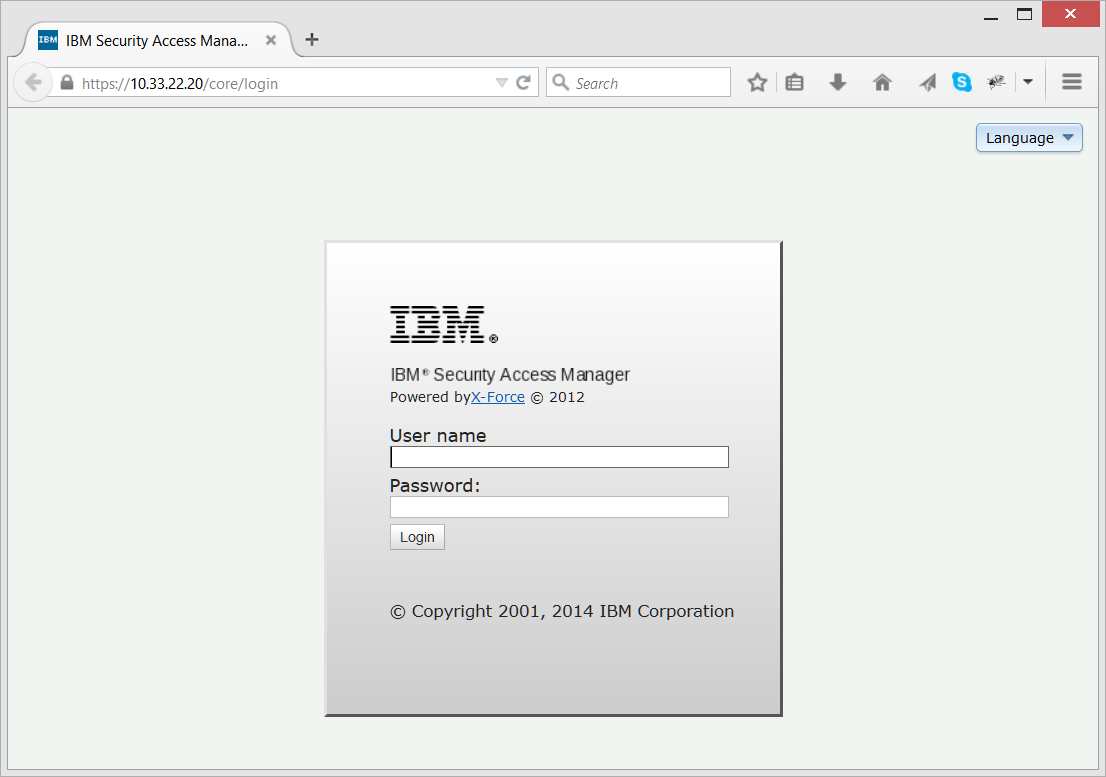
Log in to ISAM administrative URL
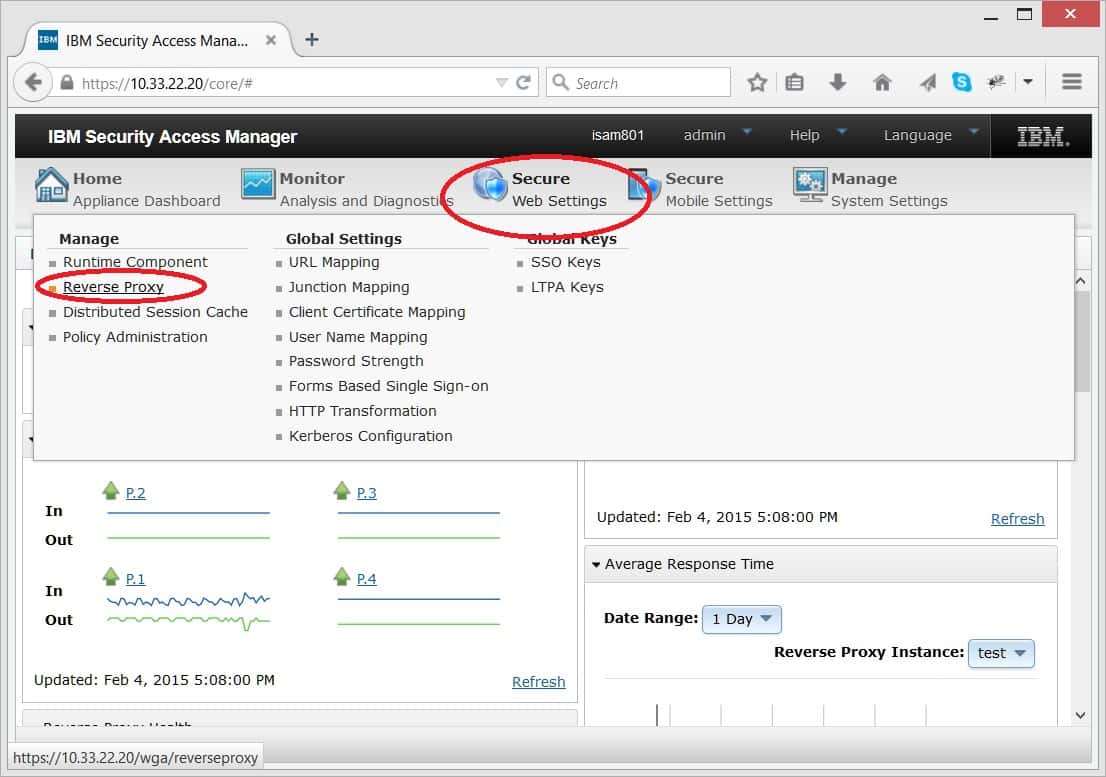
Select Secure Web Settings / Reverse Proxy
CREATE EXTERNAL AUTHENTICATOR JUNCTION
Now we are about to configure "proxy junctions"
In the proxy list, choose particular proxy and in the drop-down Manage menu select Junction Management
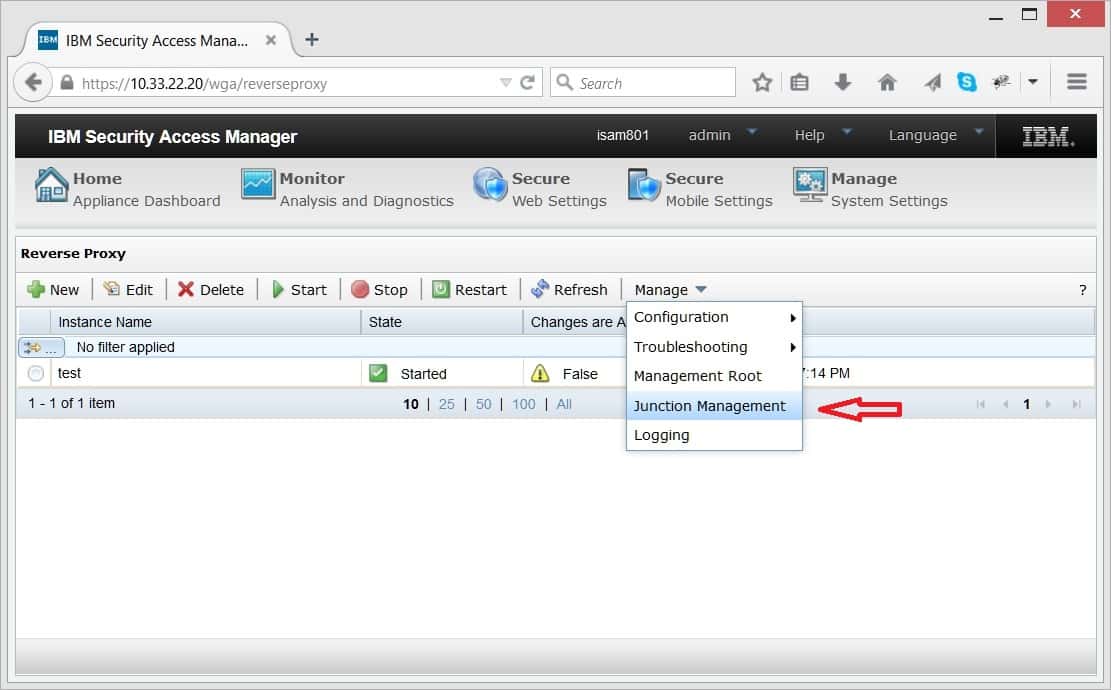
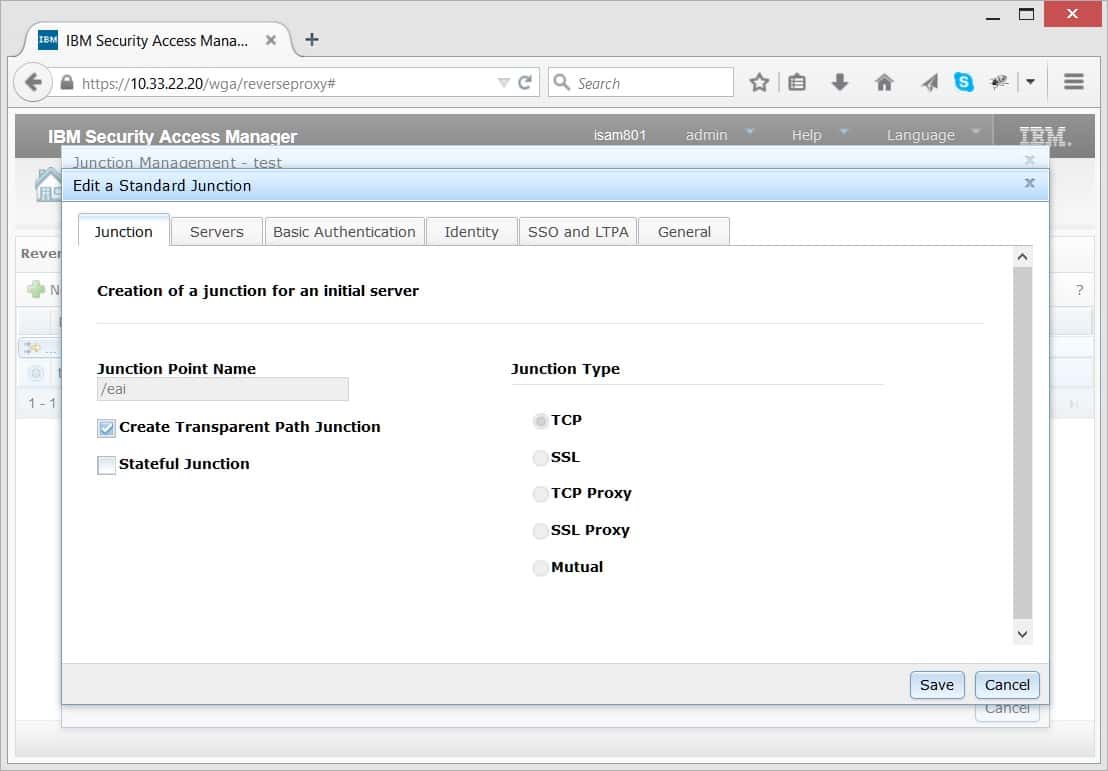
Select New / Standard Junction. Name the junction - say /eai, check Create transparent path junction and set TCP Junction type:
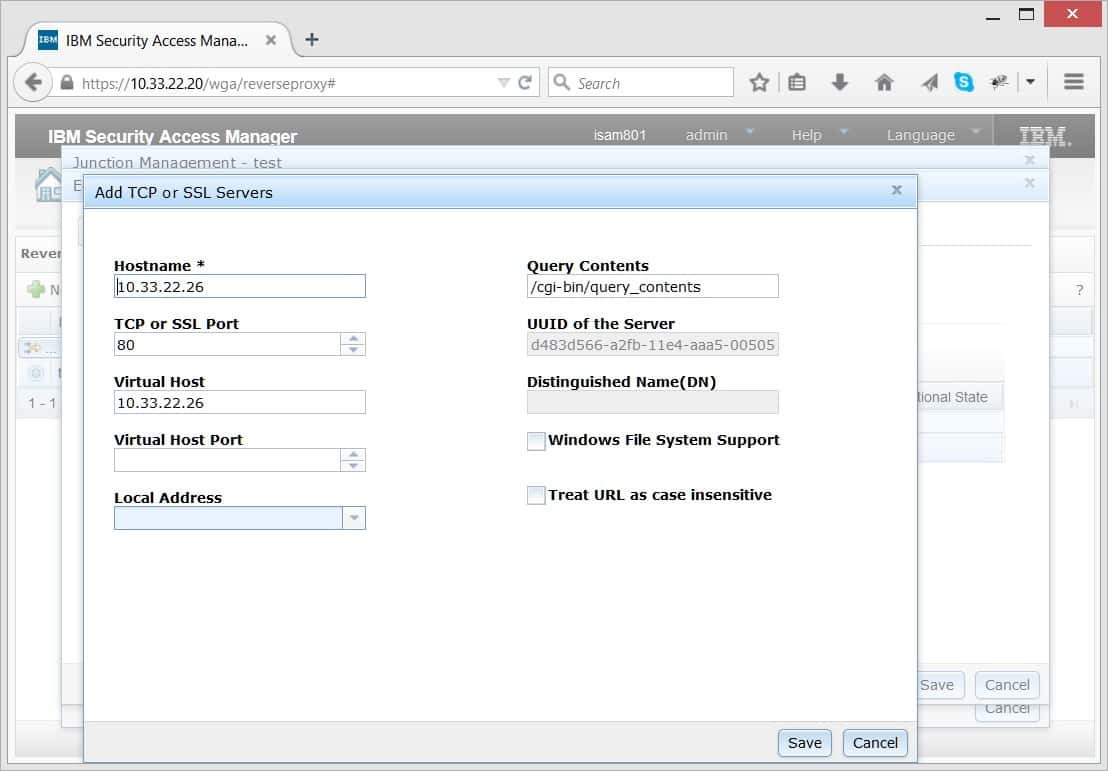
Now on the "Servers" tab, select 'New' and specify WWPass External Authenticator Server IP address and port
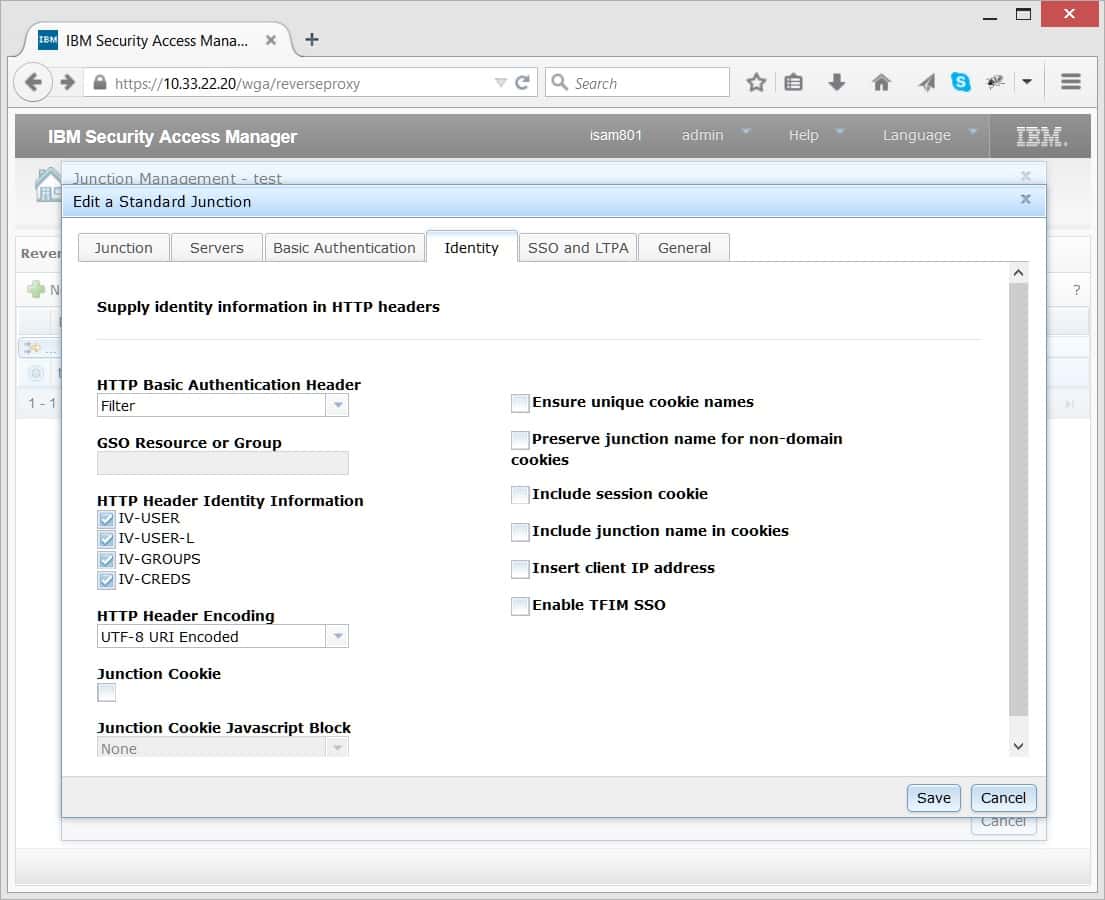
On the "Identity" tab set HTTP Basic Authentication Headers to Filter and select all check boxes in HTTP Header Identity Information:
Leave all the other tabs (Basic Authentication, SSO and LTPA and General) blank
If it is first installation of ISAM, chances are there is still no protected resource configured yet. You have to create junctions for you services.
MODIFY AUTHENTICATION RULES
Return to "Reverse Proxy" page and press Edit button.
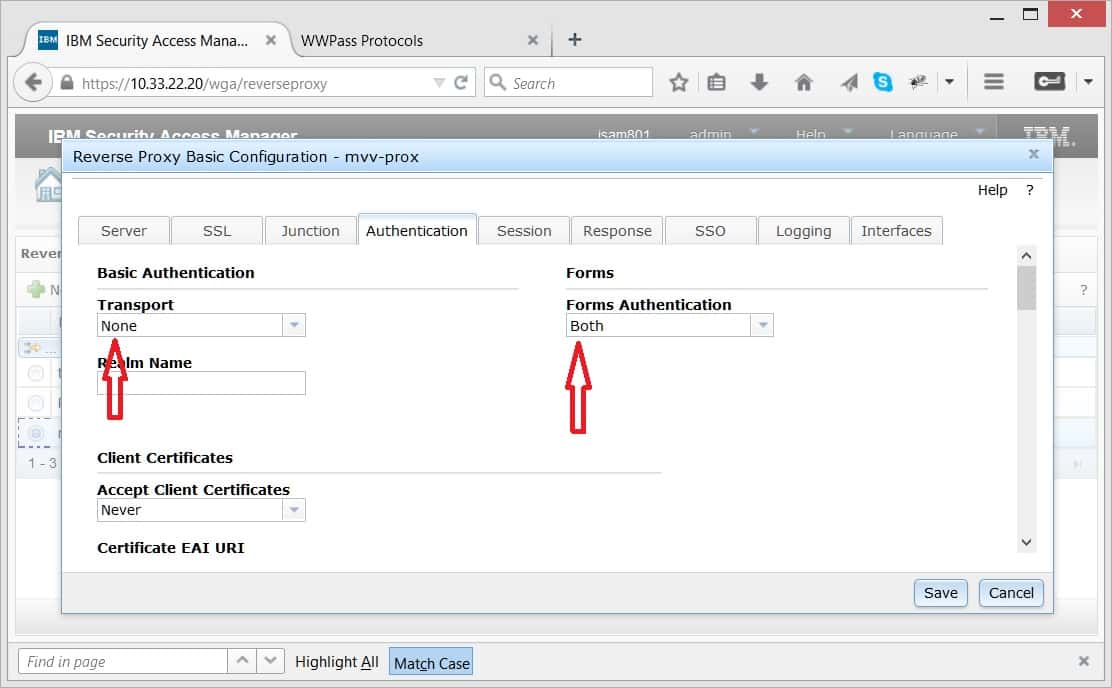
In the "Reverse Proxy Basic Configuration" dialog select Authentication tab. Be sure that Basic authentication transport is set to None while Forms set to Both
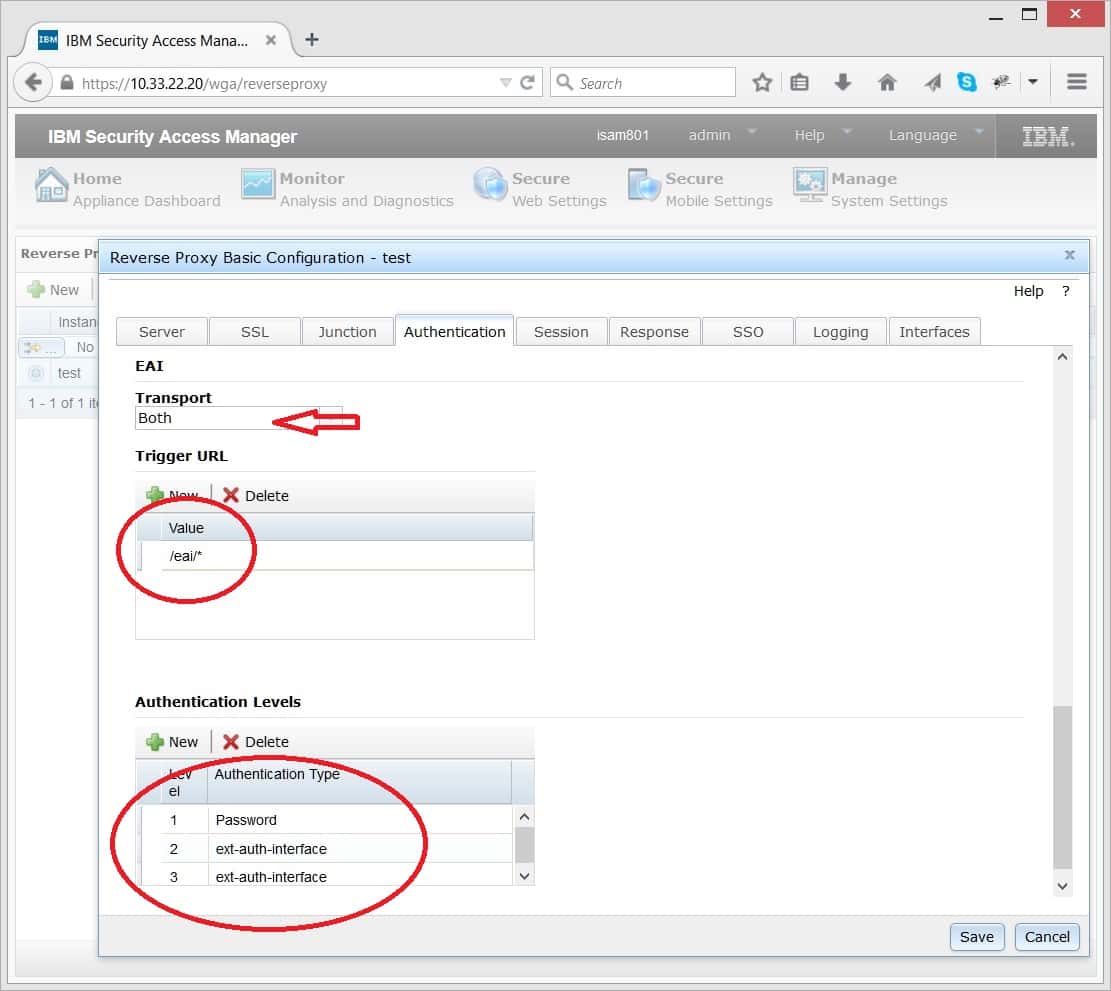
Now scroll the dialog down to EAI section.
- set transport to Both
- In the Trigger URL add /eai/*;
- add ext-auth-interface to the Authentication Levels
In case you implement different authentication levels (with and without WWPass Access Code), add another one (third) authentication level. Set it to ext-auth-interface.
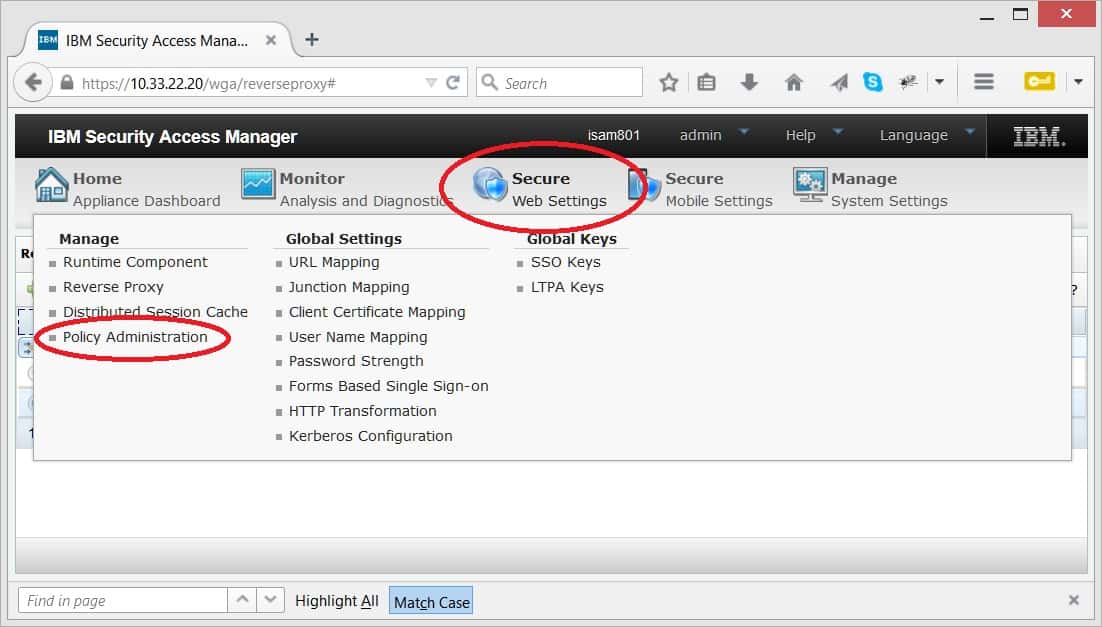
SETTING UP ACL
Authentication as a sec_master may be required.
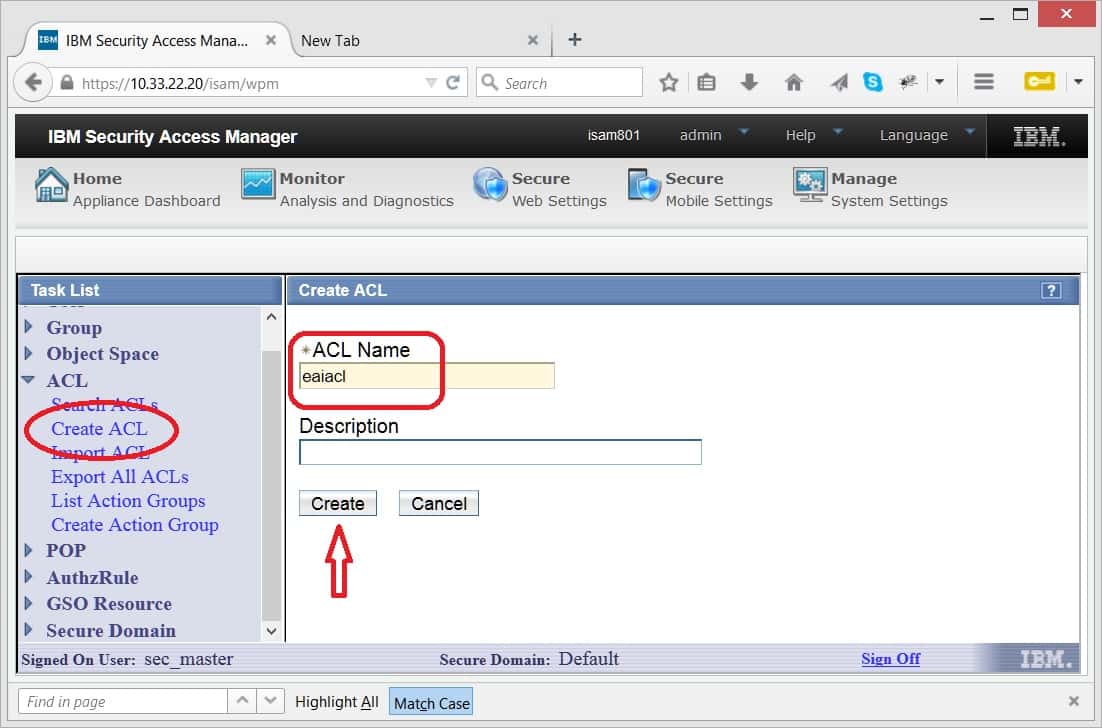
Select "Create ACL" option. Set new ACL name to e.g. eaiacl
Now select "Search ACL" option. Enter eaiacl in the search field and get ACL Properties dialog
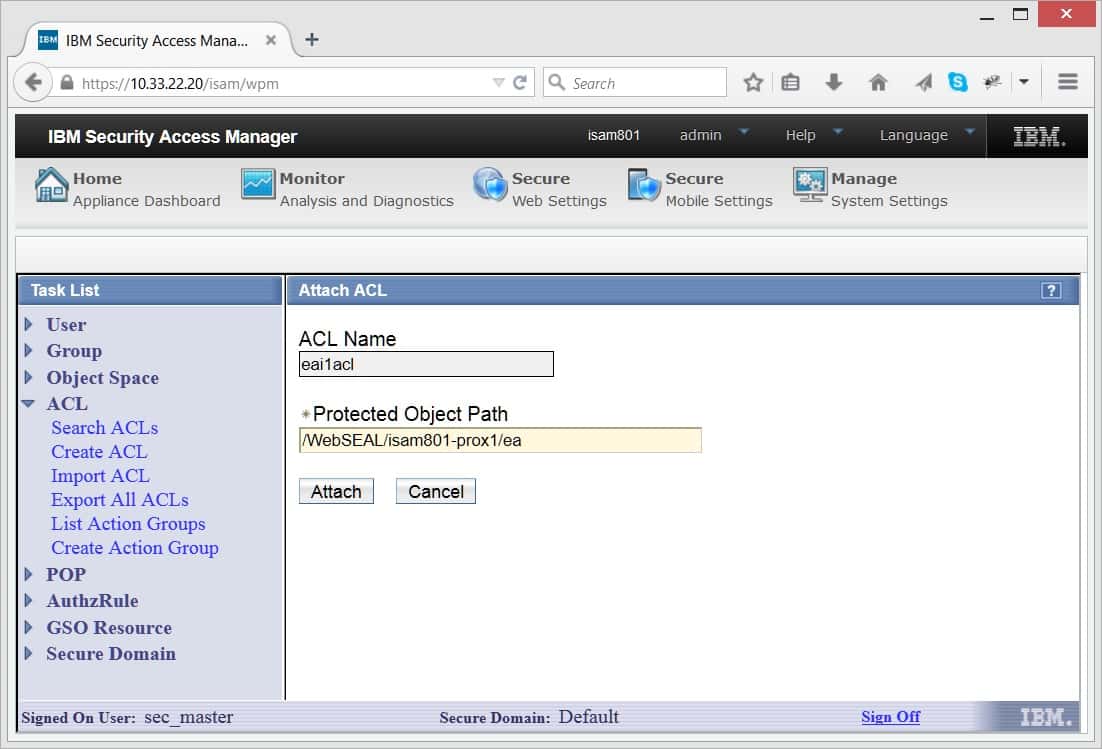
- Select "Attach" tab of the eai ACL.
- Add entry with "Any-other" type, set permissions to Trx
- Add entry with "Unauthenticated" type, set permissions to Trx
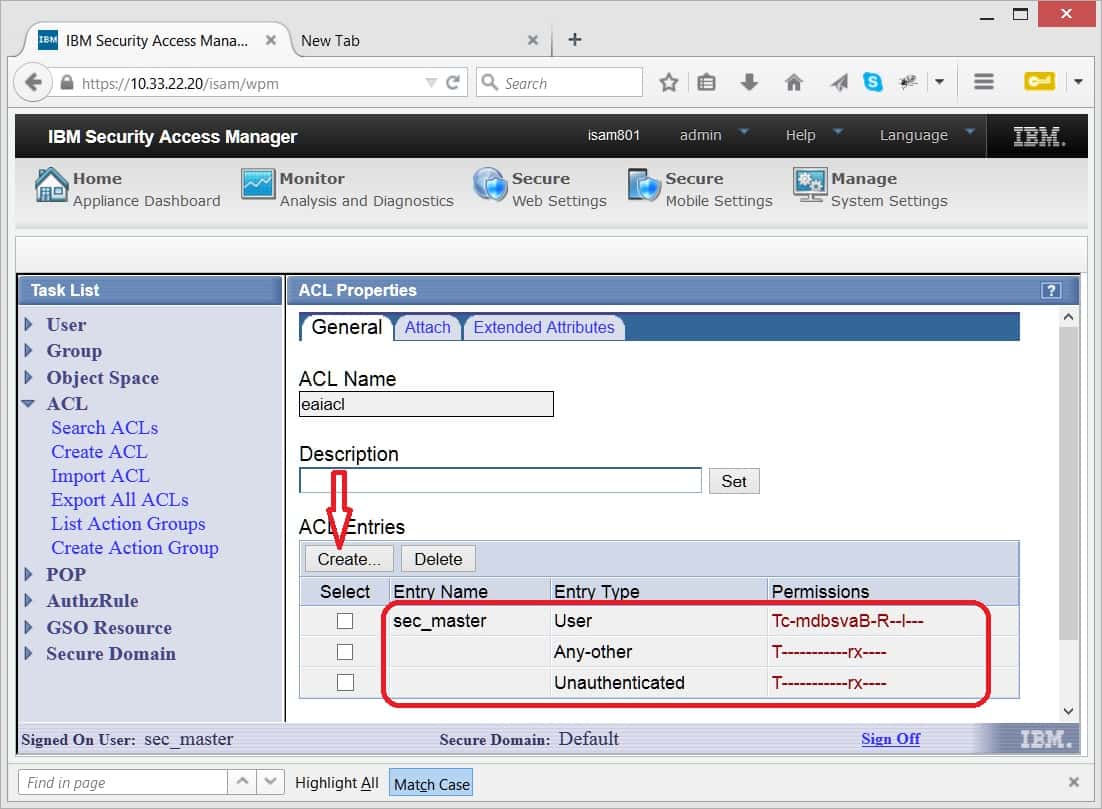
Set (or check) sec_master entry to TcmdbsvaBRI
Provided your reverse proxy name is prox1, add /WebSEAL/isam801-prox1/eai object to the ACL
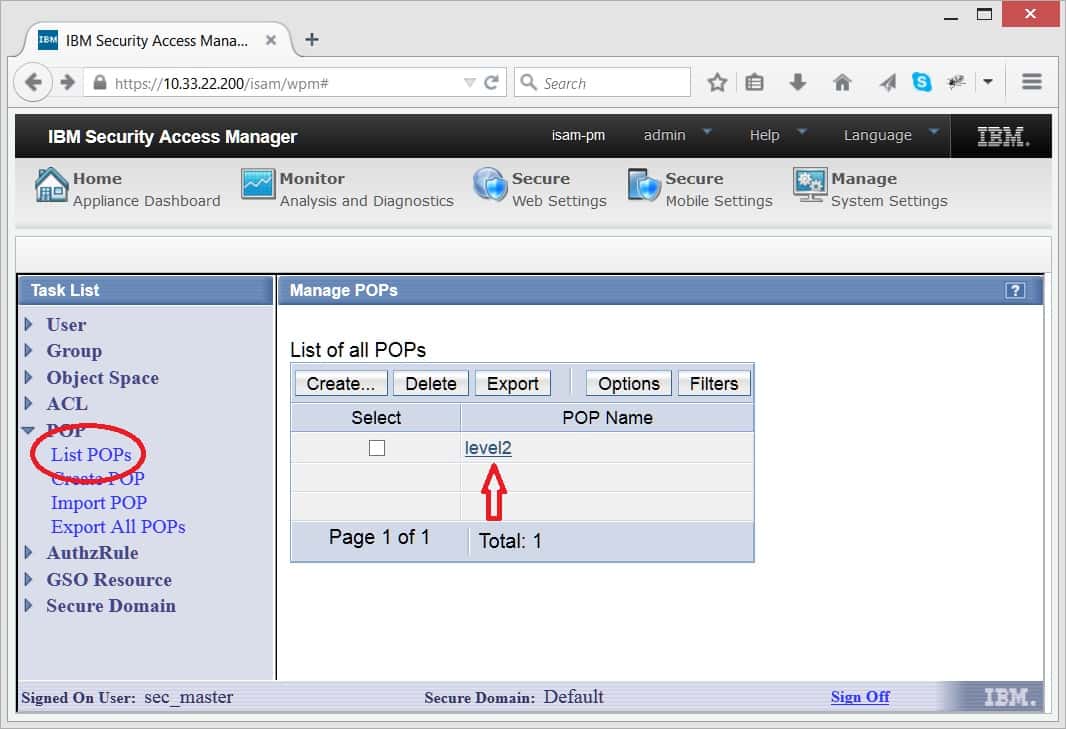
SETTING UP PROTECTED OBJECT POLICY (POP)
WWPass External Authenticator Service reports the information on whether the user provided WWPass Access Code or not. This is in compliance with ISAM definition of authentication levels. This way ISAM may be configured to request WWPass hardware authentication for user to get to selected resources. These resources will not be accessible with login/password authentication. User may be requested to provide WWPass Access Code in addition to hardware token.
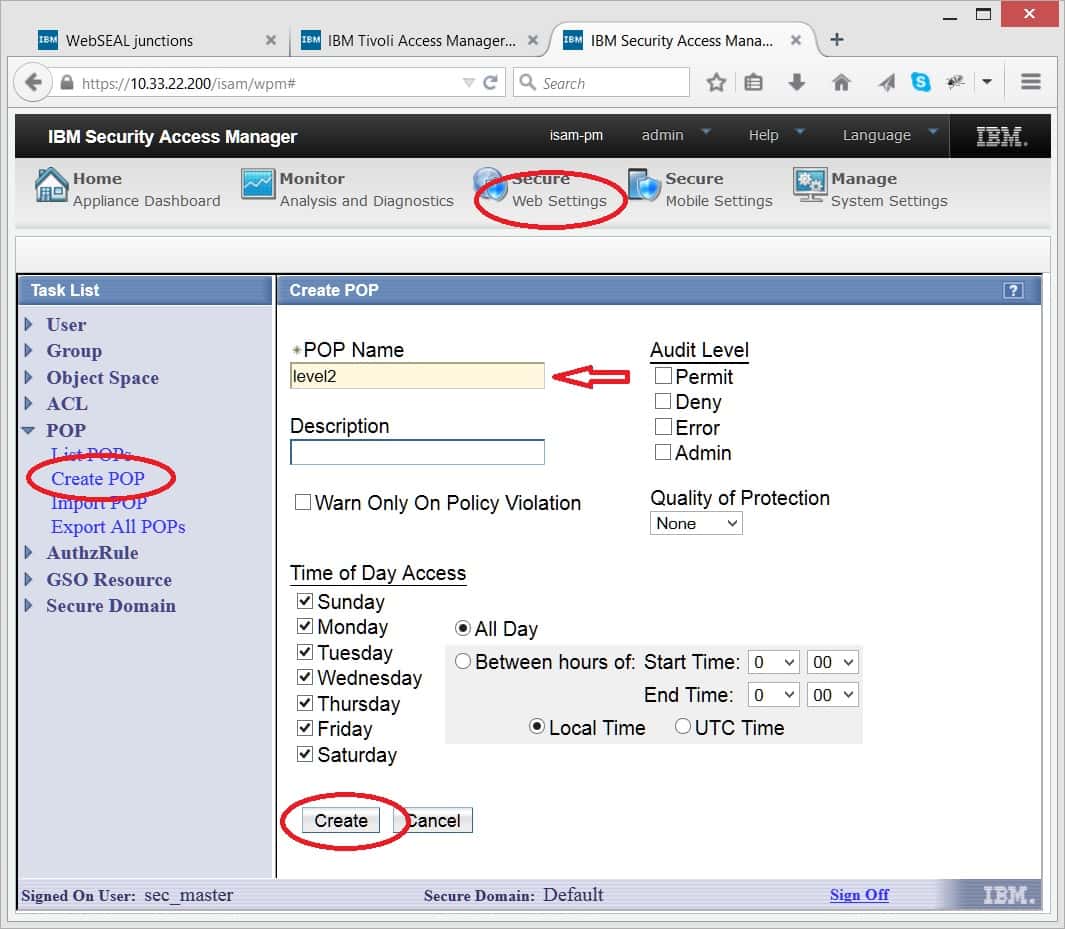
To set authentication requirements for particular resource, go to the same Secure Web Settings / Policy Administration page where ACL was set. Now click on "Create POP" link. Set arbitrary name for the new POP - "level2" in our case and press "Create" button.
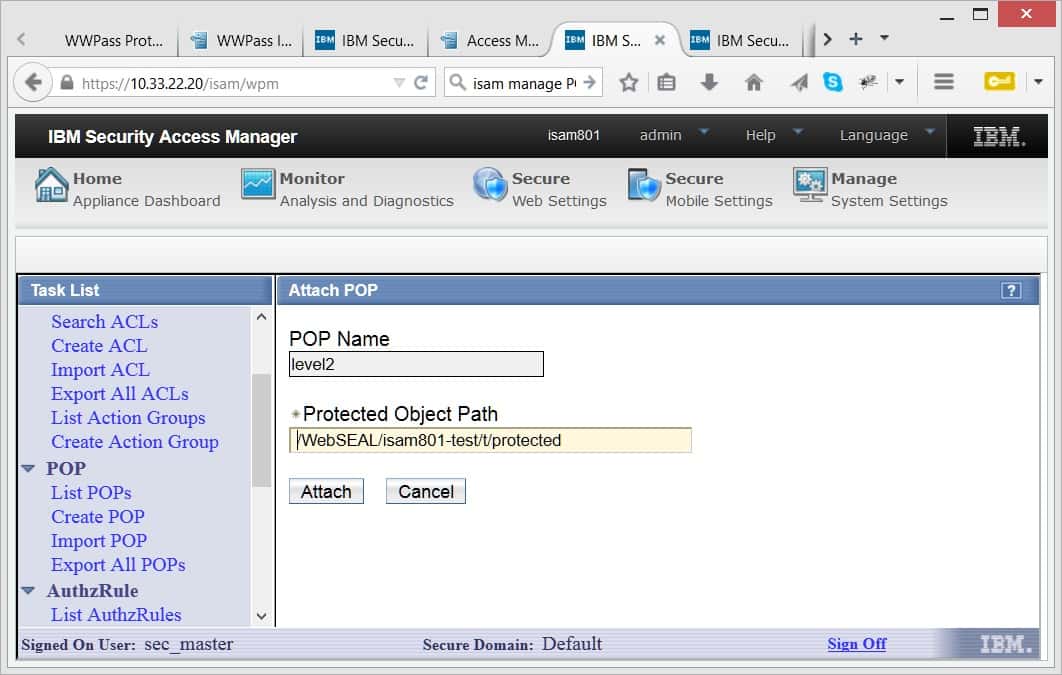
In the POP configuration dialog select "Attach" tab and press on the "Attach" button. Provide the path of protected resource which requires this level of authentication. Obviously the path of the resource is composed of the ISAM appliance name, reverse proxy name and the name of the junction to be protected. Press "Attach" button.
Now select "Search ACL" option. Enter eaiacl in the search field and get ACL Properties dialog
Finally go to "IP Auth" tab, press on "Create" button, set Authentication Level to "2" and check "Any other network" box.

You can define "level3" POP in the same way with path to "super protected" resource and Authentication level set to 3. Now ISAM will need WWPass authentication with Access Code (two factor).
Now when user authenticates with login/password pair, ISAM redirects to "stepuplogin" page with WWPass login buttons.
Setting up software
Download WWPass Software distribution
The software distribution consists of three parts:
- php code for WWPass External Authentication Server (eaidirectory)
- updates for ISAM appliance (isam directory)
- example of optional modifications in protected app (app directory)
Deploying WWPass External Authenticator
The Authenticator uses WWPass technology and plays a role of WWPass Service Provider. To learn more, read documentation on docs.wwpass.com
The WWPass solution may be deployed on any standard LAMP (Linux-Apache-MySQL-PHP) server. This server is located in internal corporate network and is accessible from ISAM appliance.
Prerequisites
- Standard LAMP server
- php5-curl package
Now follow the steps
- Unzip the distribution archive and copy /eai/ directory to a location, accessible by Apache Web server, e.g. /var/www/html/eai
- Use the file eai/wwpass.sql to create MySQL database. The file creates a wwpass_isam database and a user with the same name - wwpass_isam. This database stores the mapping between WWPass Keys and LDAP user names. It is highly recommended to change the user and password of the database.
- Edit eai/config.php file to specify particular parameters of your installation, namely database user and password as well as WWPass credentials - service provider's certificate and key files. For more details on WWPass Service Provider registration, go to docs.wwpass.com
directory indexes (directory listings) should be disabled in the /eai directory. If your Apache configuration allows indexes, rely on the included .htacces file.
ISAM reverse proxy modification
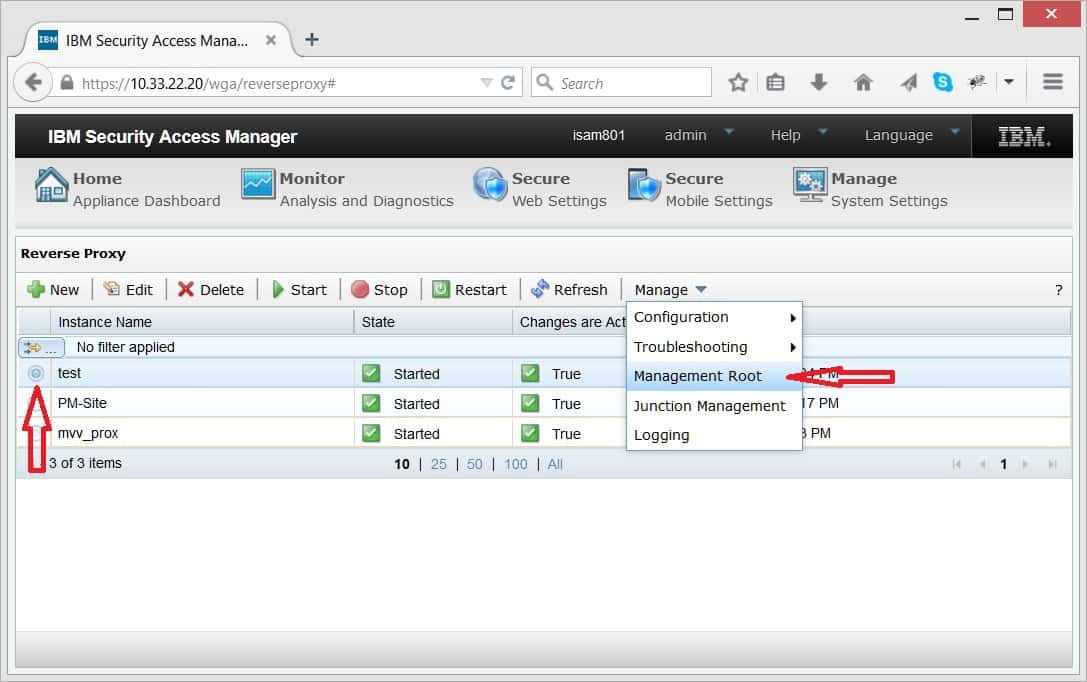
Four HTML files are to be updated on the ISAM appliance. Select particular reverse proxy you are about to protect with WWPass (Secure Web Settings -> reverse Proxy).
In the Manage menu chose Management Root item.
Locate /management/C/ directory and import (upload) login.html, logout.html and stepuplogin.html from WWPass distribution isam/management/C/ directory.
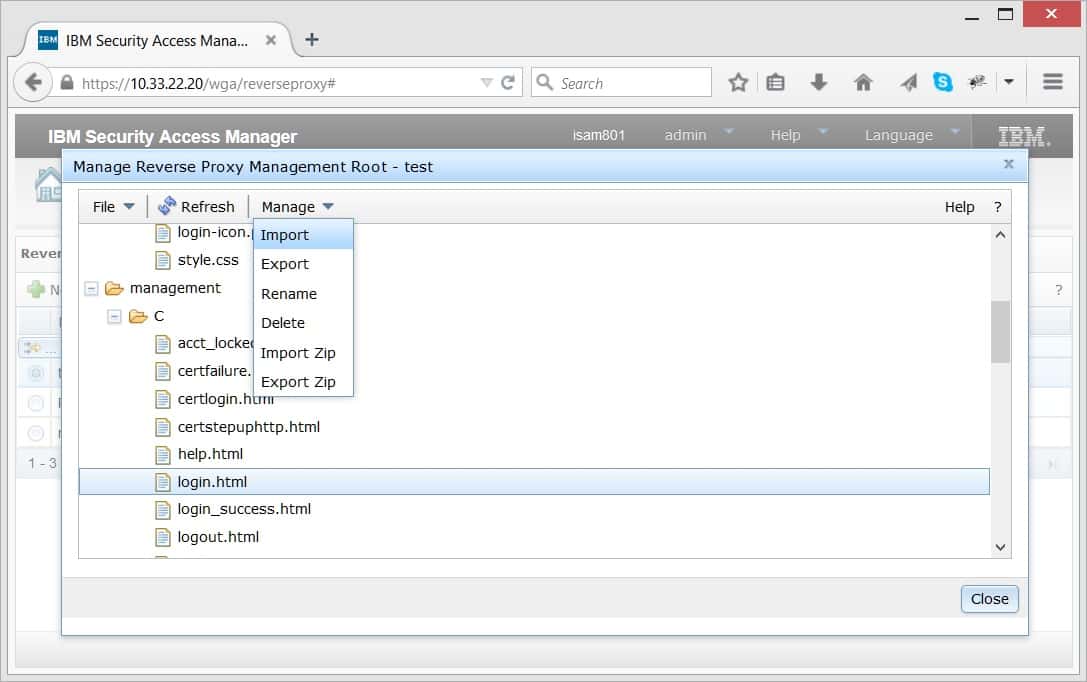
To import particular file, select it with a mouse and select Import command in the Manage menu.
Now go to /junction-root/ directory and import isam/junction-root/index.html file. The file actually redirects users to your (default) protected application. Edit the file to point to actual URL in the following line
<meta http-equiv="refresh" content="0; url=/my_protected_site">
If your WWPass EAI junction name is not /eai, change links to /eai/login.php in login.html and stepuplogin.html appropriately.
Protected pages modification
As soon as ISAM, not a protected application, actually logs the user in, and then switches the user transparently to the protected application, it is reasonable to provide Logout link in the application itself. It also worth to add another two links for key management - "Attach" and "Detach" WWPass Key.
Here are the required URLs:
  <a href="/eai/attach.php">Attach a WWPass Key </a>
  <a href="/eai/detach.php">Detach a WWPass Key </a>
  <a href="/pkmslogout">Logout</a>
You will find an example page with these links in the /app/index.php file of the distribution as well as the way to get user name and other credentials.