Getting Started With WWPass as an OpenID Connect Identity Provider in Okta
This document describes how to configure WWPass as an OpenID Connect identity provider within Okta to protect your applications.
Introduction
WWPass provides an OpenID Connect authentication connector powered by WWPass’s strong MFA and data encryption technology.
This guide will walk you through the steps needed to start using WWPass as an OpenID Connect identity provider in Okta for user authentication in your applications.
Prerequisites
Before getting started,r, you need to have an Okta developer account.
Also, you needa WWPass developer account. Open https://www.wwpass.com with your browser, click Log in, and follow the instruction to create a new developer account.
Once you’ve created the developer account, you need to register your application domain to use WWPass authentication with your Okta Web Apps. Log in to your WWPass developer account, choose Okta in the left menu and click Add new Okta Web App. Then follow the instructions to register and verify your application domain.
This is the process to register your website on the WWPass network. After completing, you will be able to provide WWPass authentication to your end users as a registered WWPass Application. Perform the following steps as prompted:
- Enter your Domain name and Okta subdomain. WWPass will display this domain name to the users during login. Click Add Domain.
- Choose the domain verification method:
- HTTP Verification
- DNS TXT Verification
- DNS CNAME Verification
Verify the domain name of your WWPass application or website. Then you will be provided with instructions on how to configure Okta enterprise authentication.
Save the client secret in a safe place. You may either instantly copy it to your application settings or store it in a password manager you trust. We suggest using PassHub for storing such information as it is the only password manager that is protected by WWPass MFA. You can always reset the client secret later if needed.
Okta With OpenID Connect
All your files and folders are presented as a tree in the file explorer. You can switch from one to another by clicking a file in the tree.
Next, open your Okta Developer dashboard.
Navigate to Security -> Identity Providers.
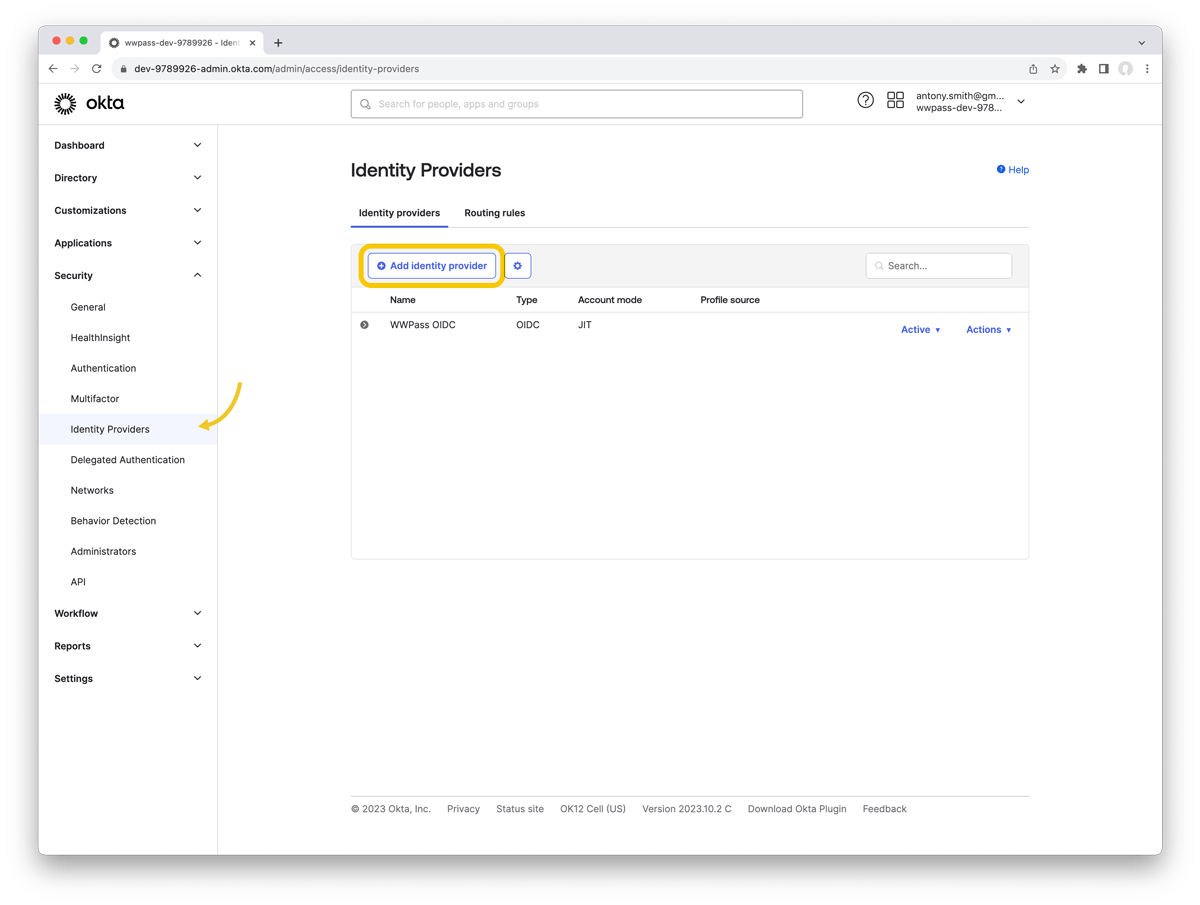
Click Add Identity Provider.
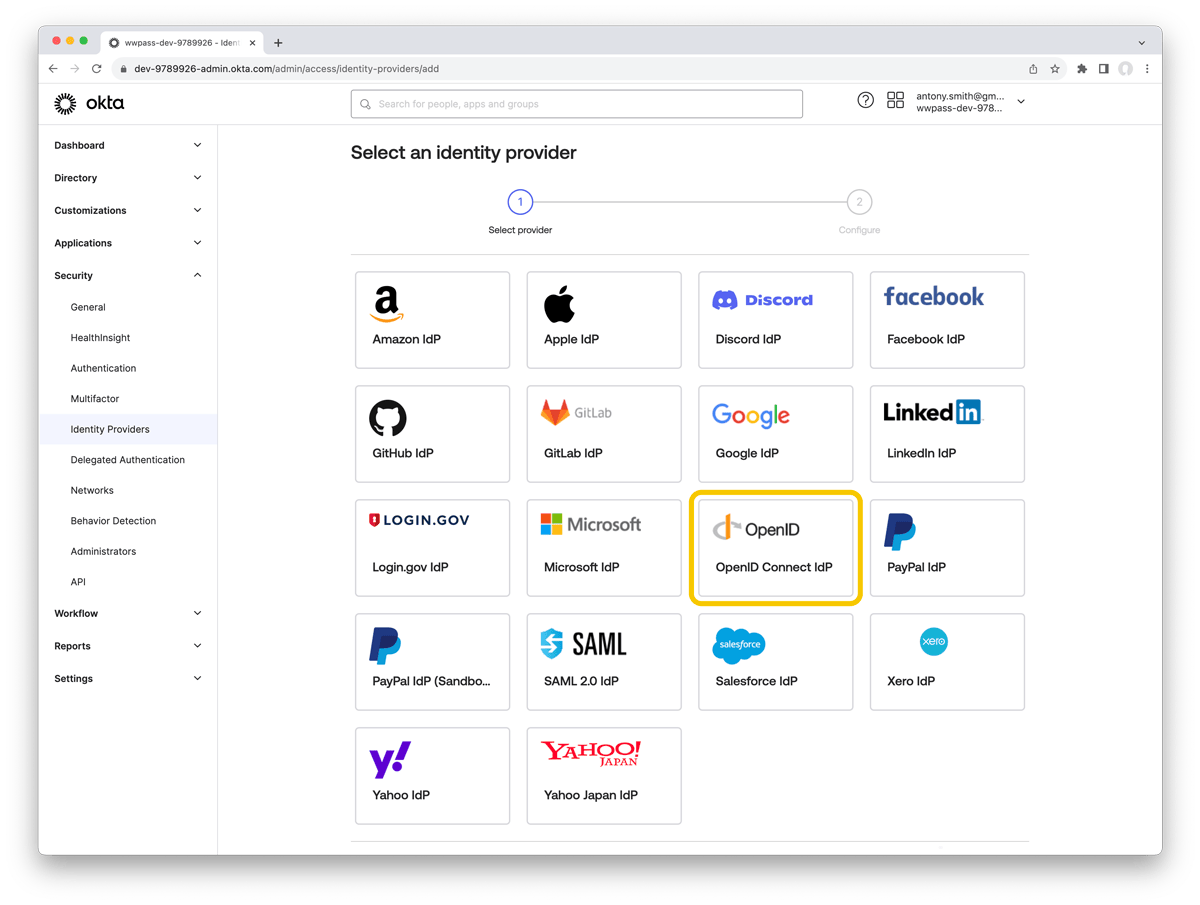
Choose OpenID Connect in the list and click Next.
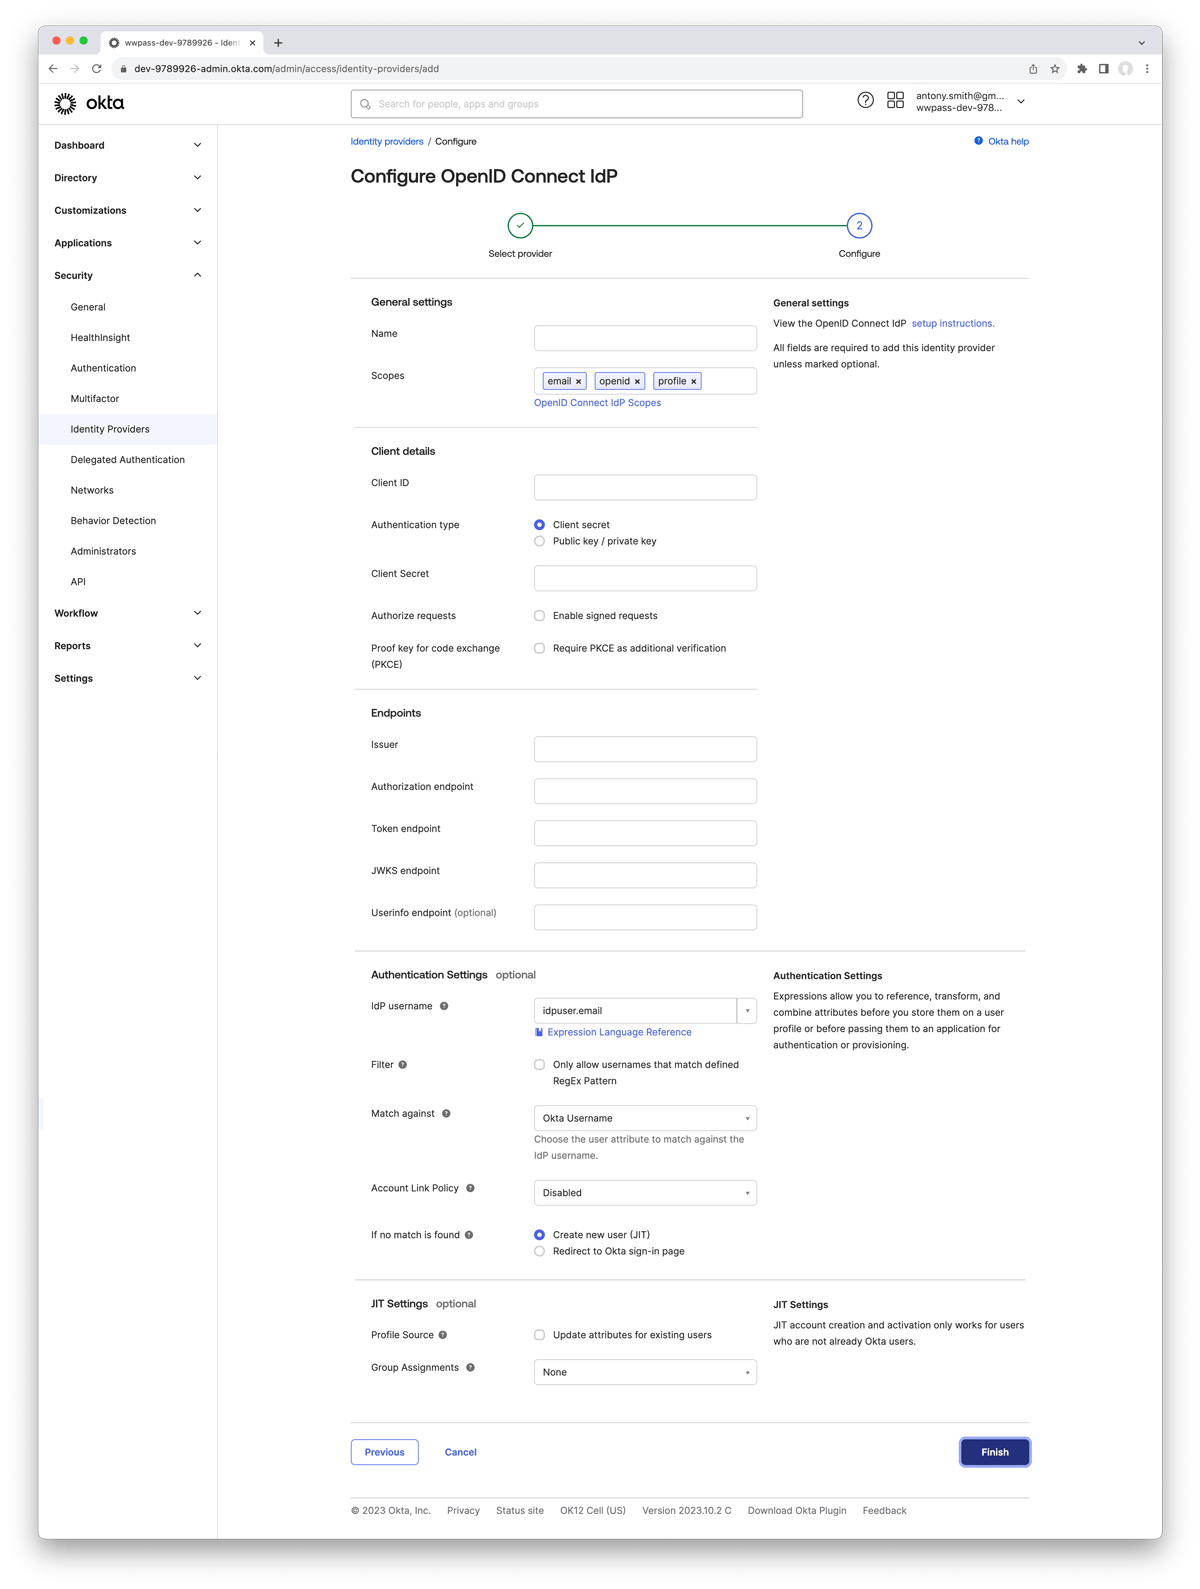
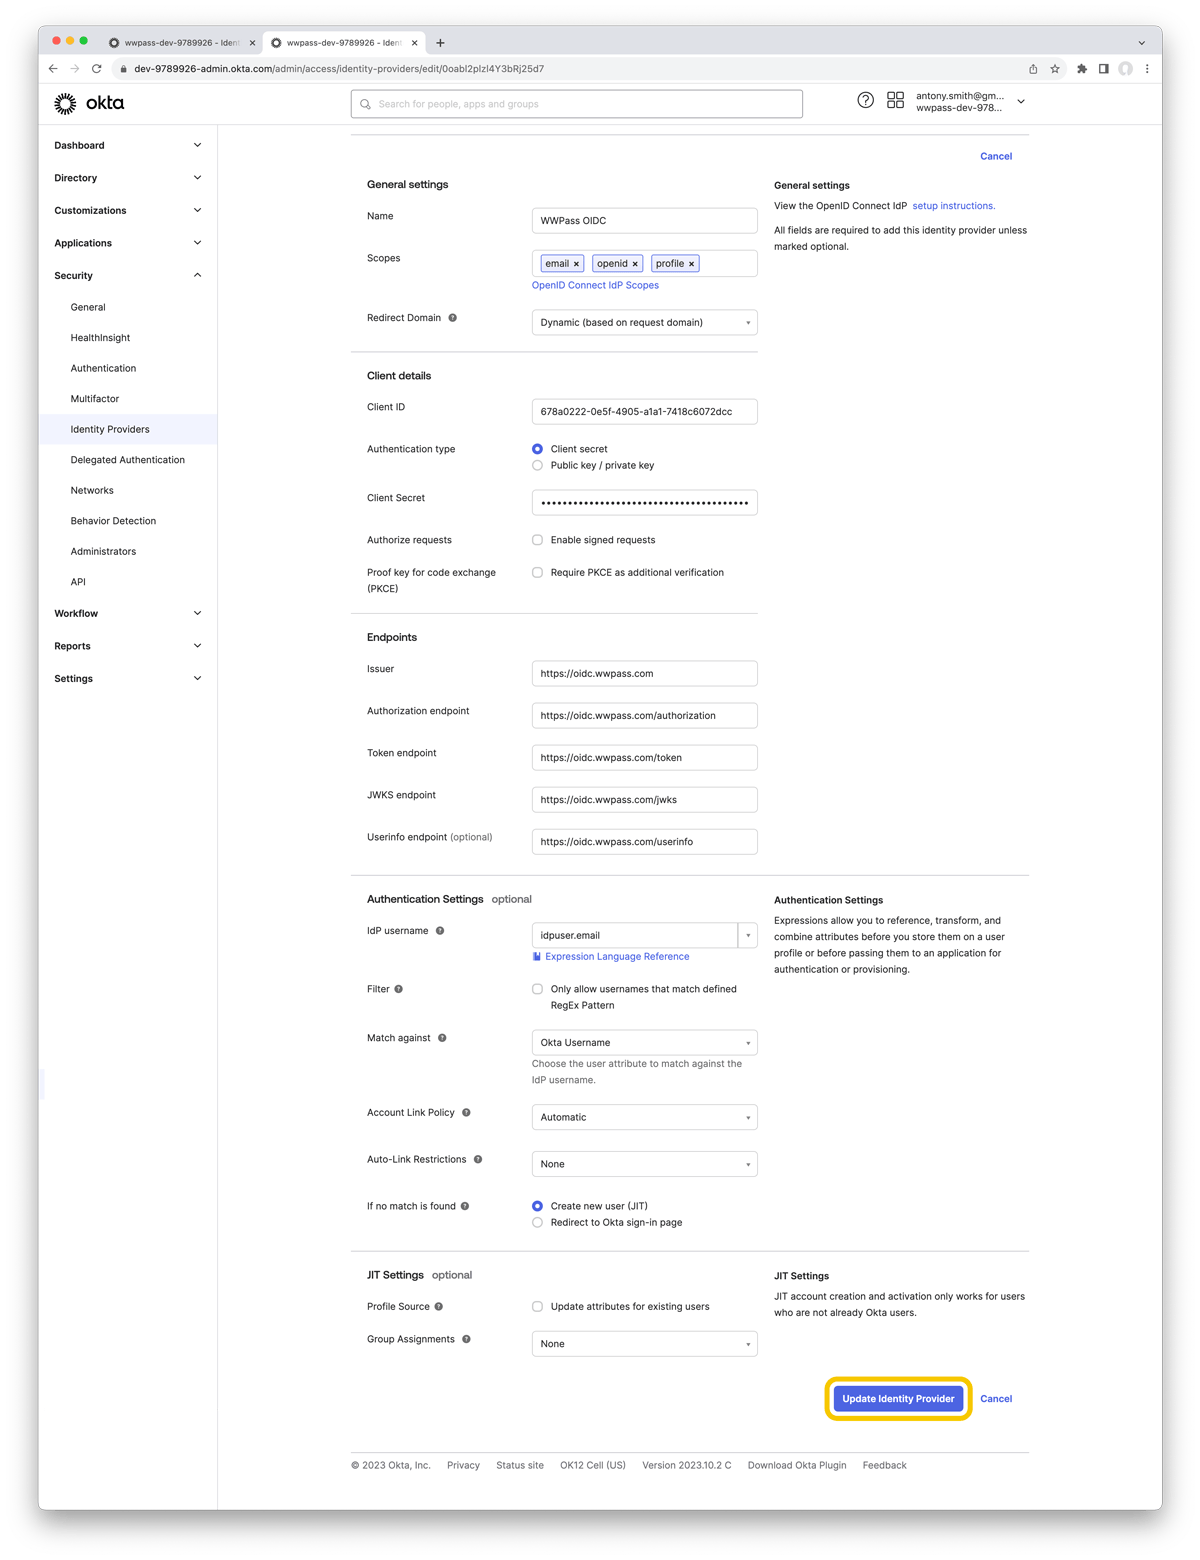
Configure the following settings in the form:
- General settings
- Set Name to any name that will allow you to identify this identity provider later;
- Set Scopes to email, openid, profile;
- Set Redirect Domain to Dynamic (based on request domain);
- Client details
- Set Client ID to the Client ID from the corresponding WWPass application page;
- Set Authentication type to Client secret option;
- Set Client Secret to the Client Secret from the corresponding WWPass application page;
- Leave Authorize requests and Proof key for code exchange (PKCE) options blank;
- Endpoints
- Set Issuer to
https://oidc.wwpass.com; - Set Authorization endpoint to
https://oidc.wwpass.com/authorization; - Set Token endpoint to
https://oidc.wwpass.com/token; - Set JWKS endpoint to
https://oidc.wwpass.com/jwks; - Set Userinfo endpoint to
https://oidc.wwpass.com/userinfo;
- Set Issuer to
- Authentication Settings
- Set IdP username to idpuser.email ;
- Leave Filter option blank;
- Set Account Link Policy to Automatic ;
- Set Auto-Link Restrictions to None ;
- Set If no match is found option to Create new user (JIT);
- JIT Settings
- Leave Profile Source option blank;
- Set Group Assignments to None.
Click Update Identity Provider to complete the Identity Provider creation.
You can also use WWPass authentication instead of the default username and password to access your Okta developer account. The following steps allow you to customize your login experience.
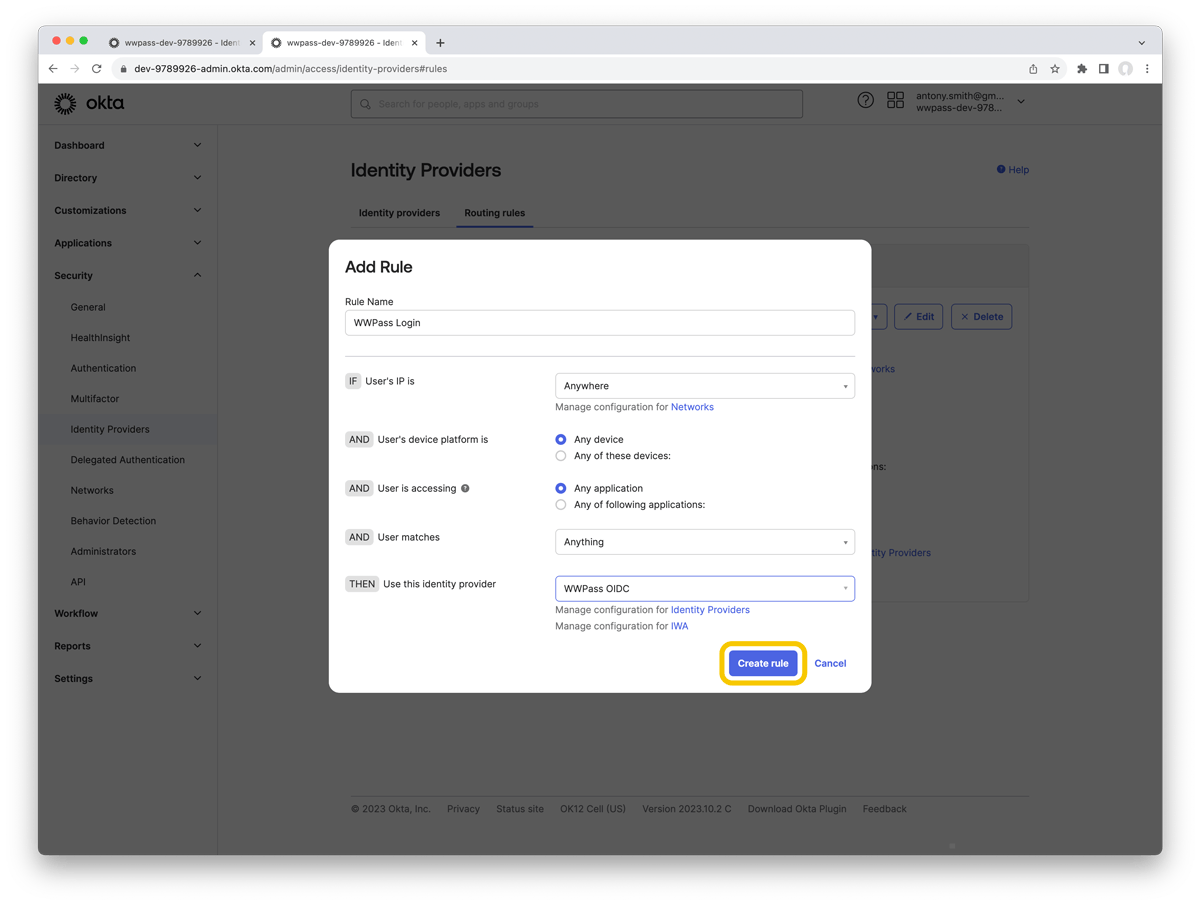
After adding Identity Provider navigate to Security -> Identity Providers -> Routing Rules.
Click Add Routing Rule.
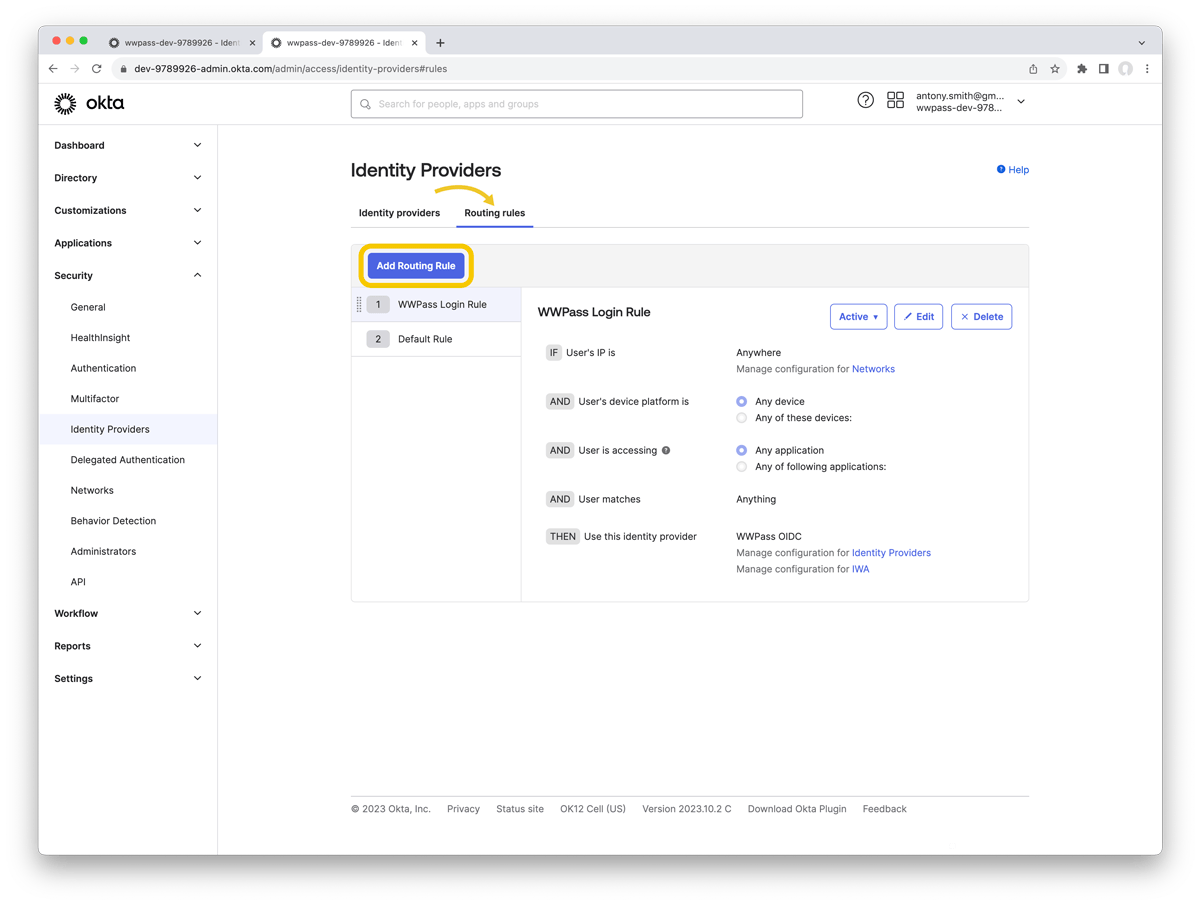
Make the following settings in the form:
- Set Rule Name to any name that will allow you to identify this Routing Rule later;
- Set Use this identity provider to the name of the Identity Provider created earlier.
Click Create rule to complete your login experience customization.